This article explains how to configure the POS left-hand navigation and customize the POS tiles in the Sale module. You will learn how to add and reorder navigation sections, control visibility, and adjust tile text, visibility, and order across all accounts.
Step 1: Open the POS Navigation Configuration
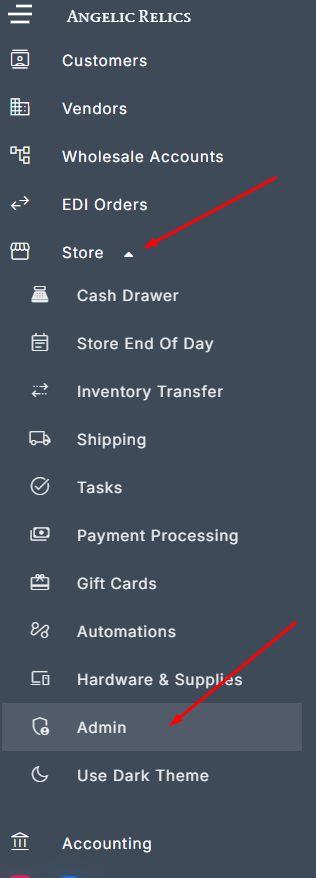
- Go to the Admin Module to access the POS navigation settings.
- Under Store, select Admin.
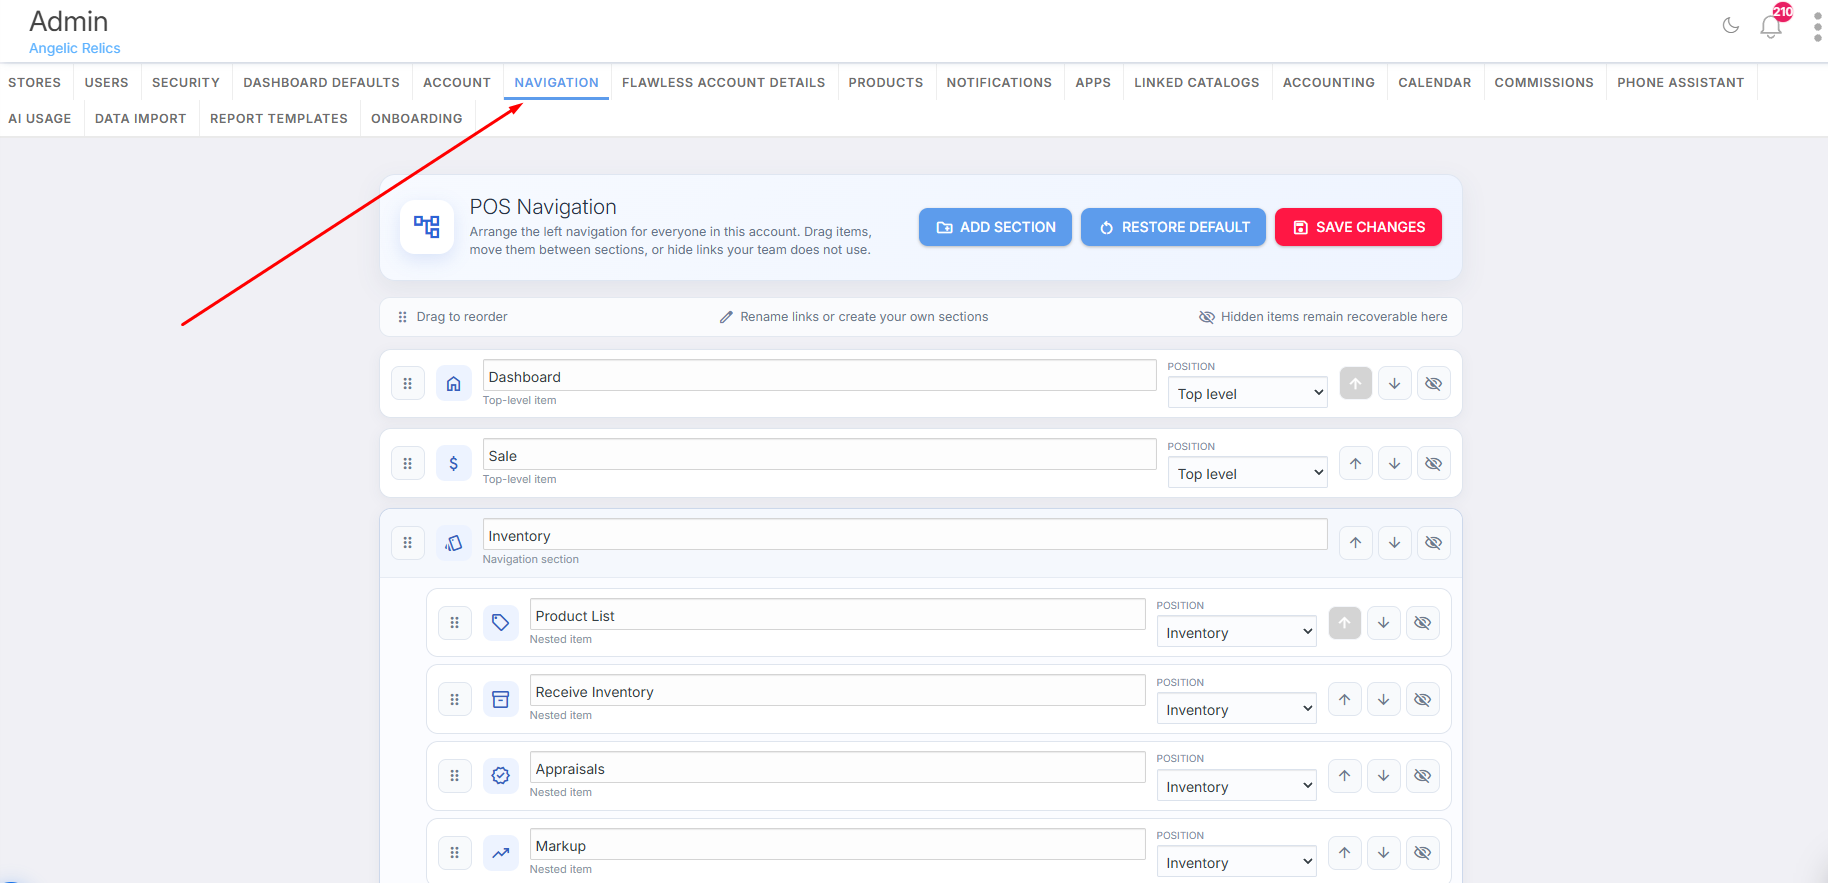
- Open the Navigations tab to view the POS navigation configuration screen.
Step 2: Manage Navigation Sections and Items
In the POS navigation configuration, you can configure and reorder the navigation options shown on the left side of the POS screen. You can add new sections, restore the default layout, hide sections or options, and drag items to reorder them.
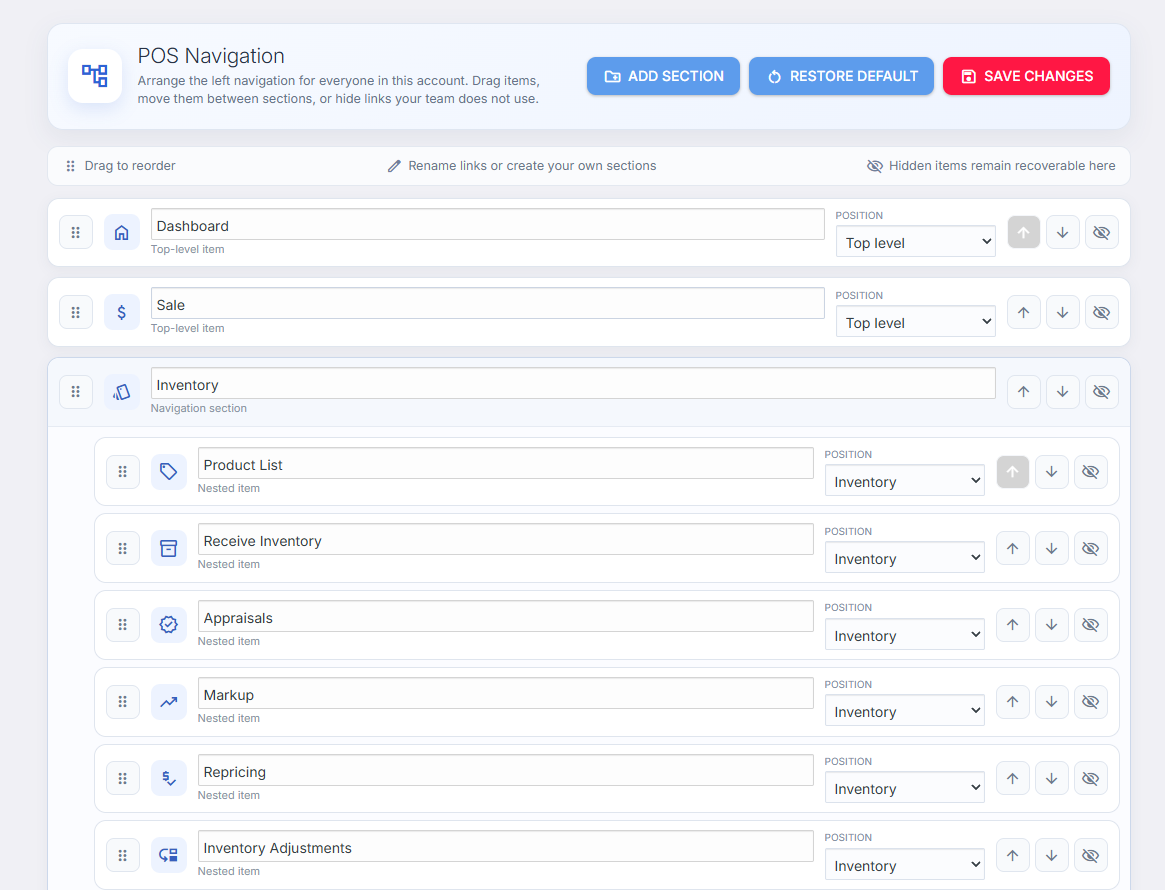
To reorder items within a section, click and hold the dotted handle on the left side of a card and drag it to the desired position. You can also use the up and down arrows on the right side of each card to move items up or down in the list.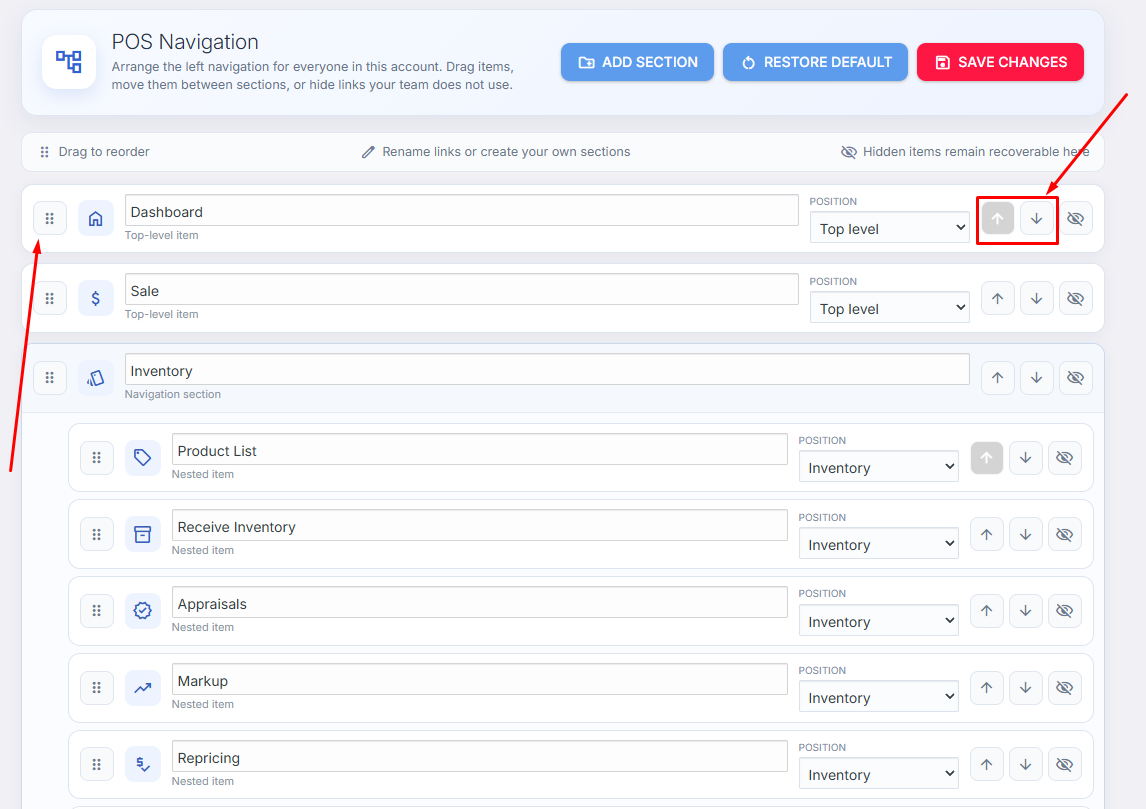
Step 3: Change Item Position Between Sections
You can change the position of a navigation item so that it appears in a different section or at the top level. For example, you can move the Sale module from the top-level navigation and place it under the Inventory section. When you change the position, the item will appear inside the selected section in the navigation bar.
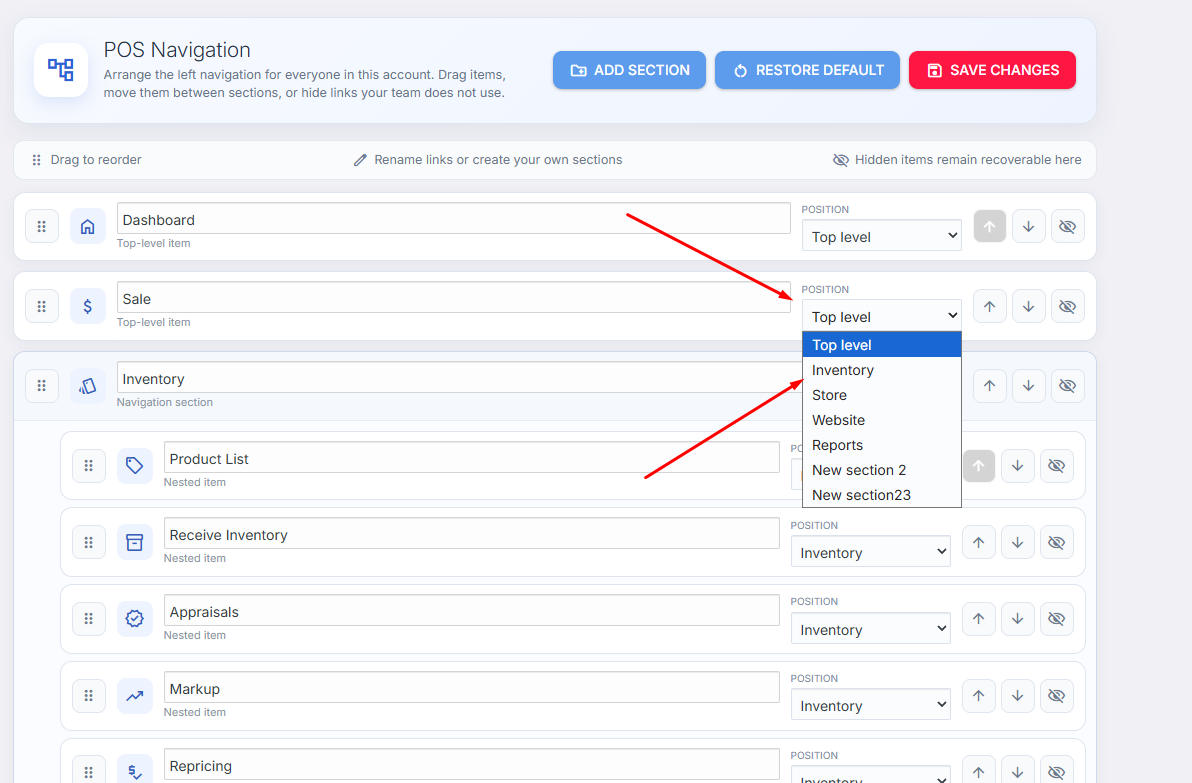
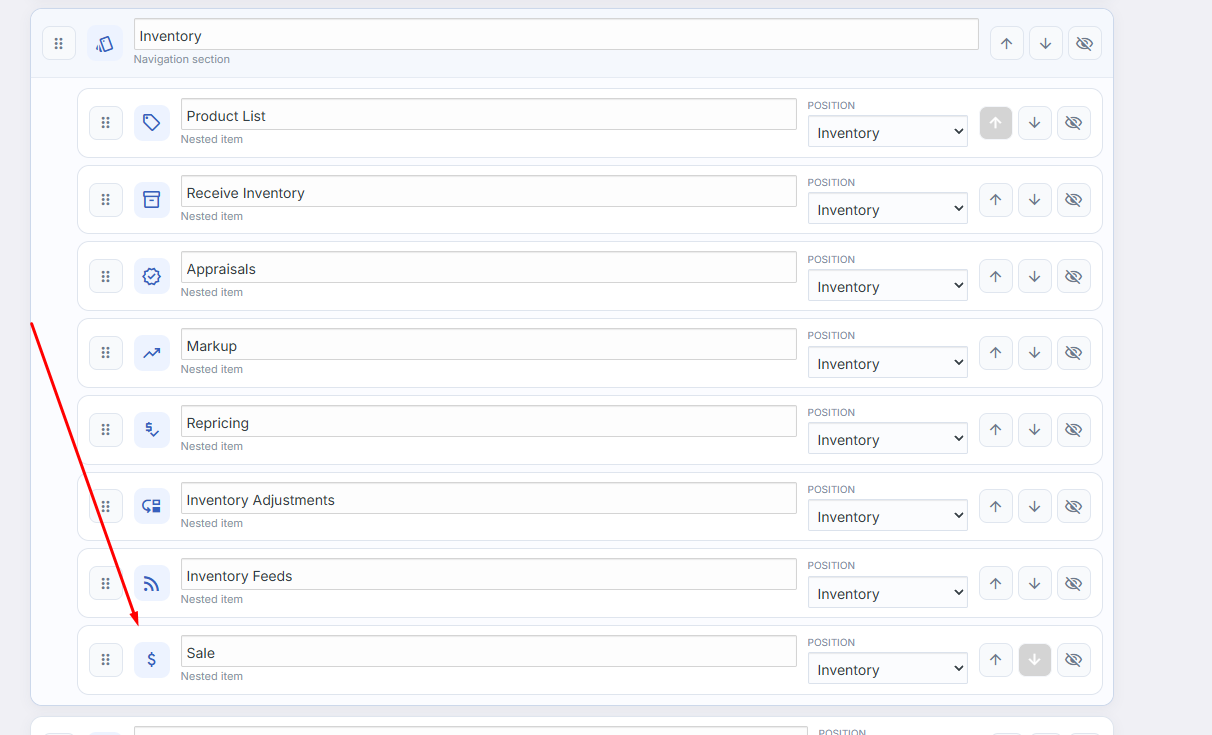
The Top level position means the item appears directly on the main navigation bar. All visible items shown at the root of the navigation are considered top-level sections. Other position options correspond to the existing navigation sections currently available in your configuration.
Step 4: Create Sections and Understand Empty Section Behavior
When you create a new navigation section, it will not appear in the navigation bar unless it contains at least one item. For example, if you create a section and save your changes, it will not be visible after refreshing the page if it has no items.
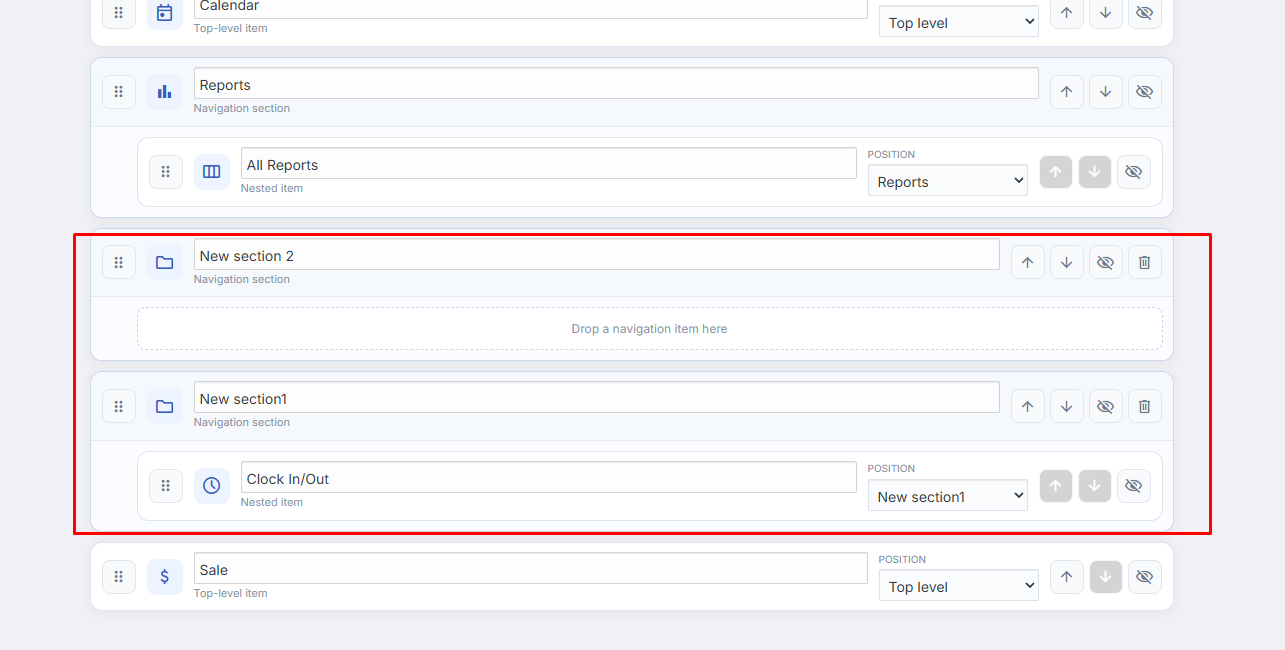
To make a new section visible, move at least one navigation item into it. For example, move the Clock In/Clock Out item into a new section. After saving and refreshing the navigation bar, Section 1 will appear, and any section that becomes empty will be hidden.
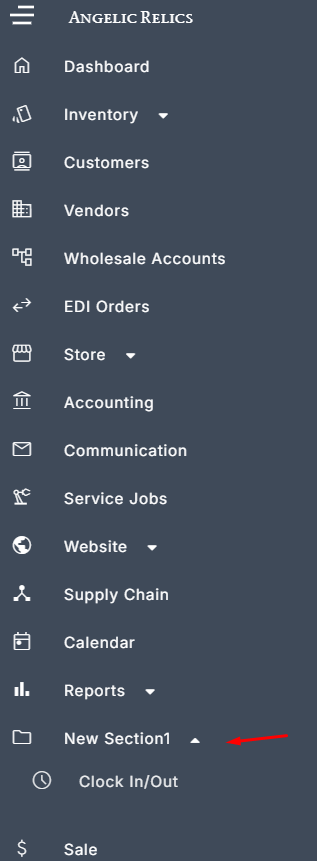
Note: All navigation changes made in this configuration screen are applied at the account level. Any modifications, such as reordering, hiding, or moving items between sections, affect all users in the system. Every user will see the same navigation layout based on these settings.
Step 5: Open the POS Tile Configuration in the Sale Module
To configure POS tiles, go to the Sale module. In this screen, you will see multiple tiles representing different actions or processes.
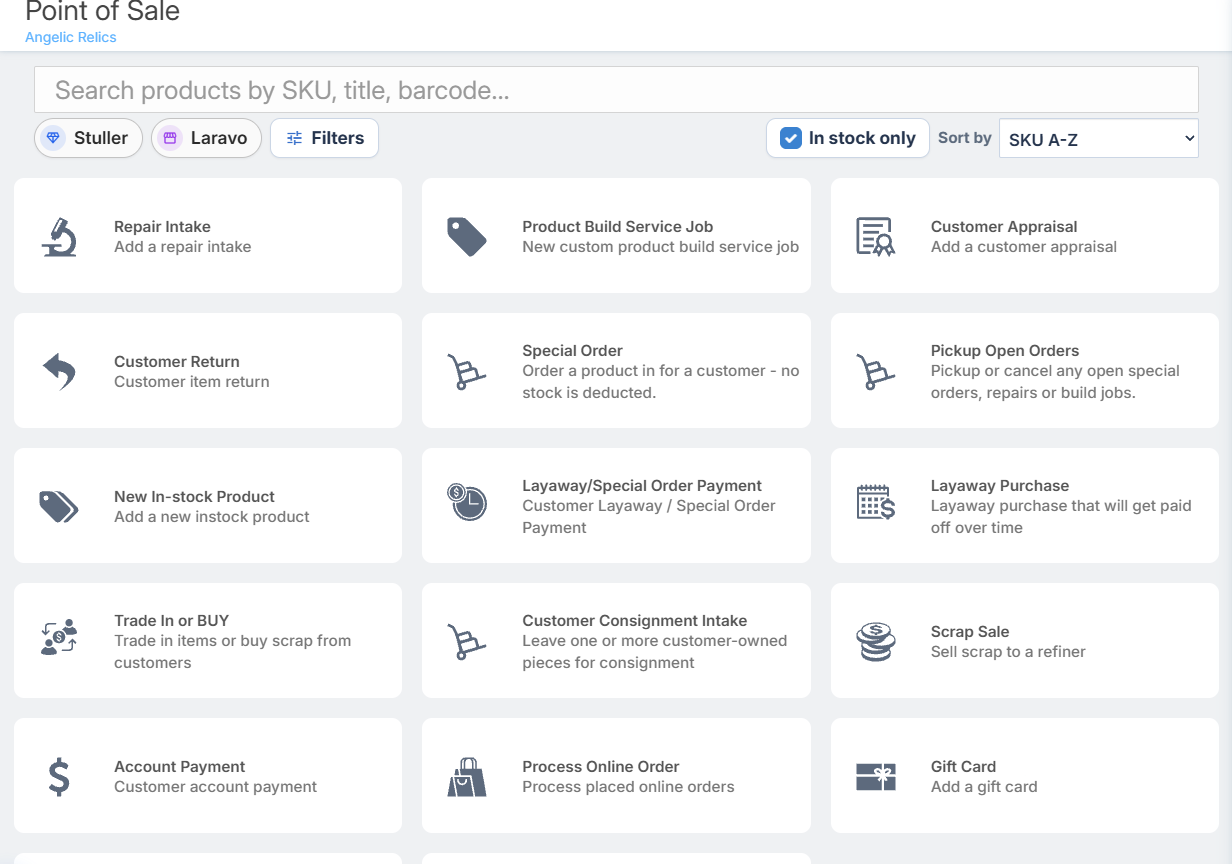
Step 6: Update Tile Text and Restore Defaults
Right-click any tile to open its configuration options. Select Update Tile Text to change the tile’s name (title) and description. You can also reset these fields back to their default values.
The default values are shown as reference text under each field. For example, the default title for one tile is Process Online Order, and the default description is also indicated below the description field.
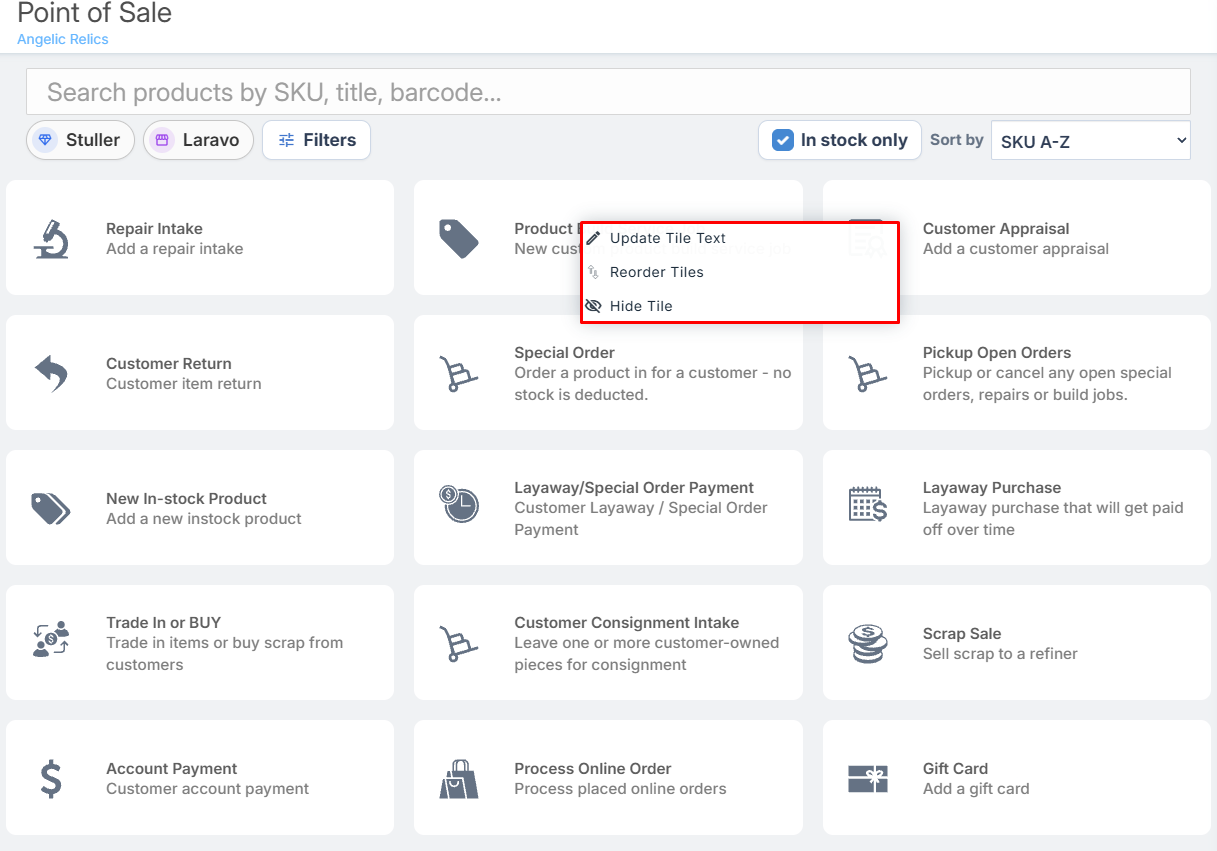
Step 7: Hide and Restore Tiles
From the same right-click menu, you can choose to Hide Tile. When a tile is hidden, it becomes invisible to all non-admin users in the account. Admins will still see the tile, but it will appear faded and marked as hidden so they can restore it if needed.
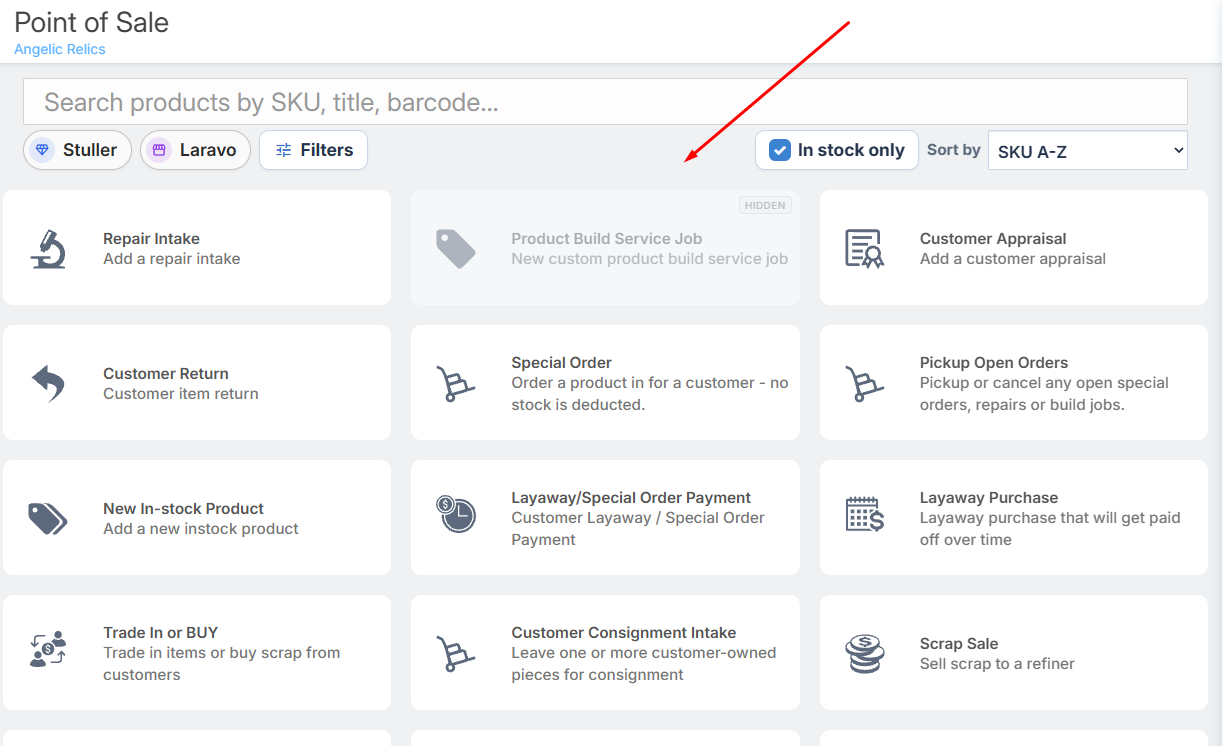
For example, if you hide the Process Online Order tile, it will disappear for staff and store managers. After refreshing the Sale module, admins will see the tile labeled as hidden. To show the tile again, right-click the faded tile and select Show Tile. Confirm the prompt, refresh the page, and the tile will become visible again to all users.
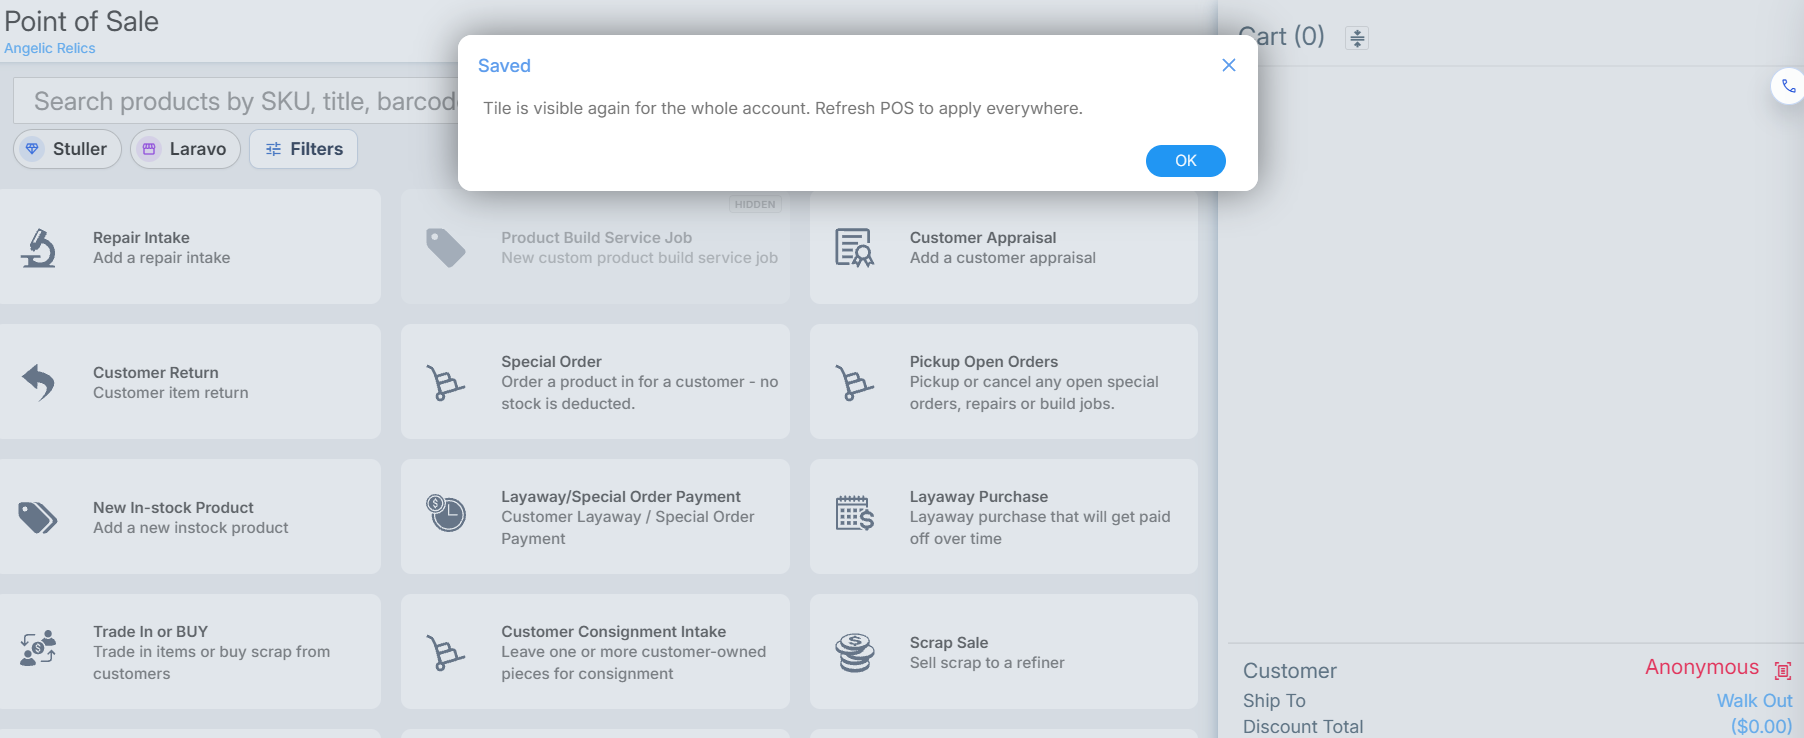
Step 8: Reorder Tiles and Reset to Default Order
To adjust the order of tiles, open the Reorder Tiles screen. This screen allows you to rearrange how tiles are displayed. At the bottom of the screen, there is an option to reset the tiles back to their default order.
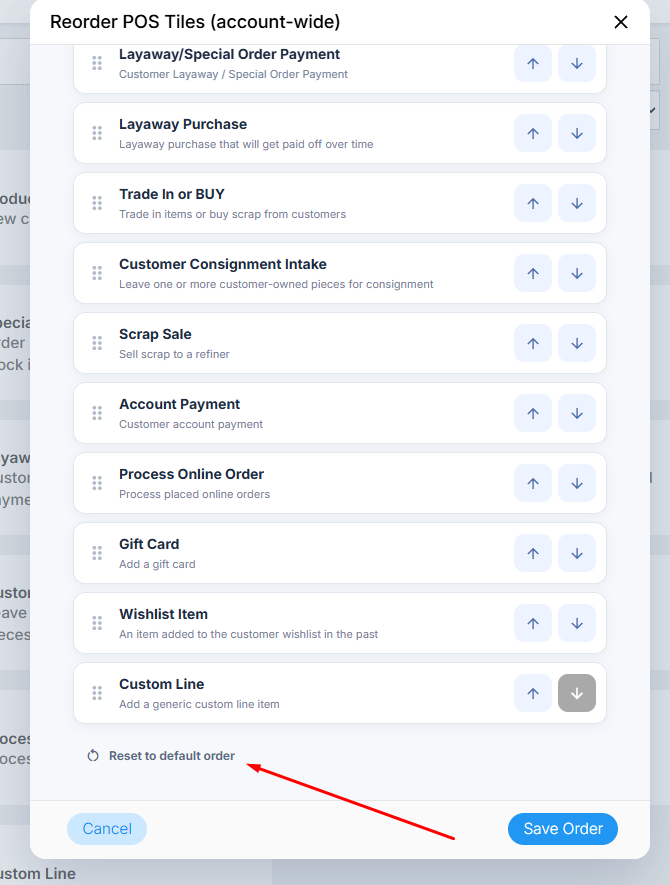
You can move tiles up or down using the arrow controls, or drag and drop the tile cards to reorder them. The tile layout is filled from left to right and then top to bottom, for example, the first row may show Gift Card, Process Online Order, and Account Payment from left to right; the next row will start with New In-Stock Product and continue in order across the row.
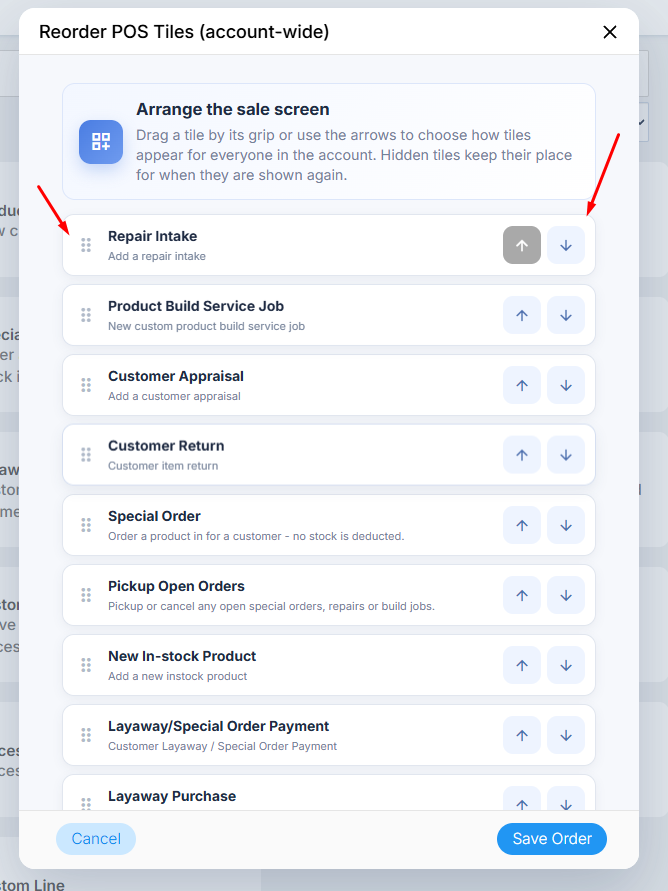
When you are satisfied with the new order, click Save Order to immediately apply the changes. After saving, refresh the Sale module page to see the updated tile arrangement. If needed, you can open Reorder Tiles again and select Set Back to Default to restore the original tile order, then refresh the page to confirm it has reverted.
Troubleshooting
For any issues encountered when modifying the Navigation and POS Tiles , please contact Flawless POS support for assistance.
Was this article helpful?
That’s Great!
Thank you for your feedback
Sorry! We couldn't be helpful
Thank you for your feedback
Feedback sent
We appreciate your effort and will try to fix the article