You can now create and manage custom builds directly within the Checkout App to streamline your sales and production workflow.
Step 1: Start a New Sale
When you open the Flawless Checkout App, tap Point of Sale from the home screen and select Start a New Sale.
From here, you can proceed just like any standard sale — choose the salesperson handling the transaction and select or add the customer for the build.
If you need help adding a new customer from the Checkout App, you can refer to this article: https://support.flawlesspos.com/support/solutions/articles/150000213866-how-to-create-a-new-customer-in-the-flawless-checkout-app
Step 2: Open the Services module
Once the sale is started, navigate to the Services section on the app and select the Build icon.
This will open the custom build form where you can enter all relevant details for the project.

Step 3: Enter build details
In the build form, start by entering the description of the custom build and a completion date.
If the build is already finished, you can also mark it as Completed before saving.
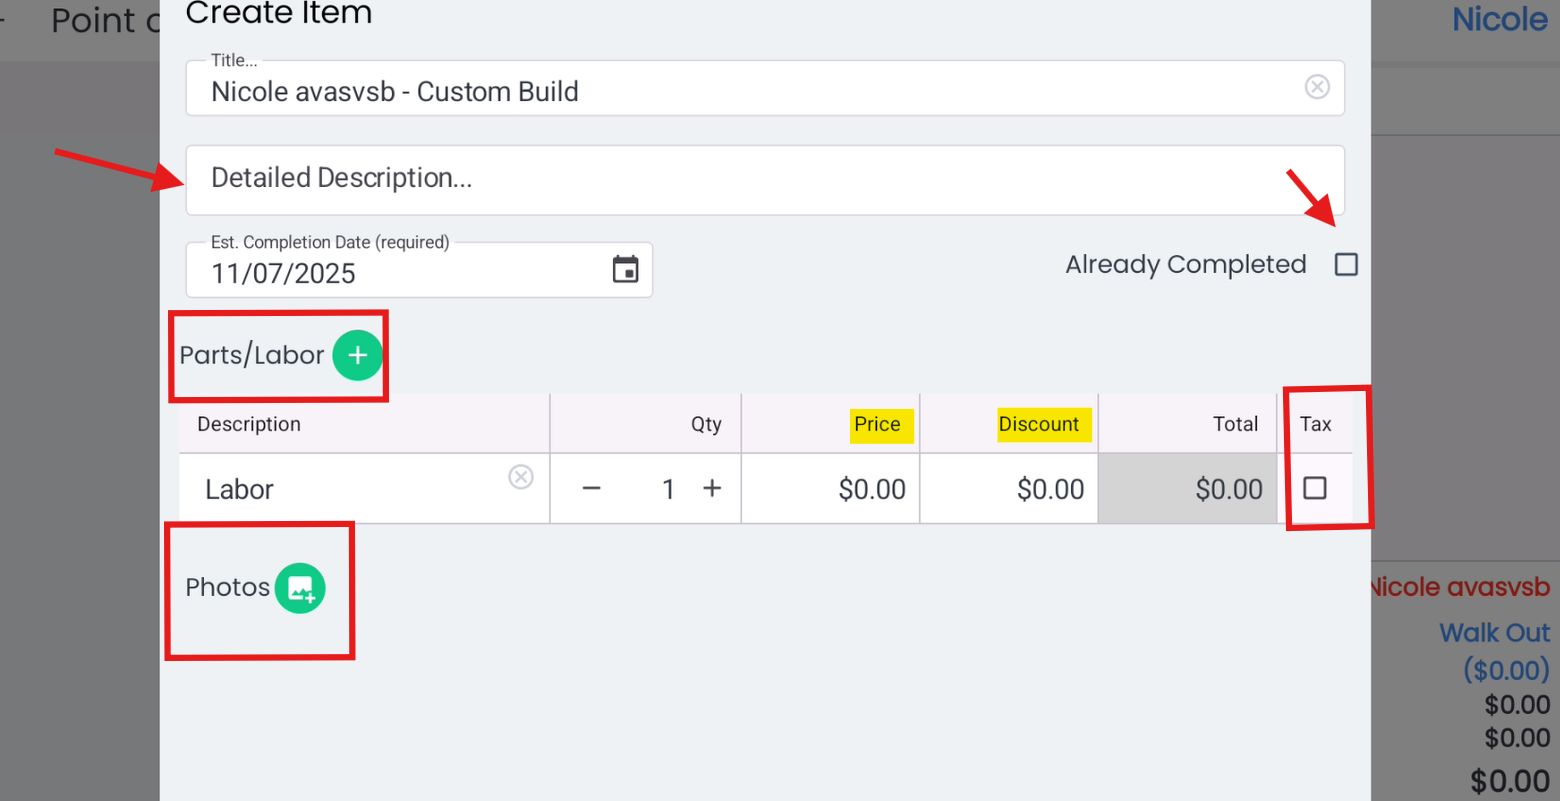
Step 4: Add Parts and Labor
Under the Parts/Labor section, select the type of entry you want to add:
Labor – for any time-based work or craftsmanship

Part – for components or materials included in the build
Customer-Owned Part – for materials provided by the customer
For each entry, specify the quantity, price, discount, and tax (if applicable).
This ensures all costs are accurately reflected in the customer’s invoice.
Step 5: Upload photos and references
You can upload photos directly to the build form for reference or documentation.
This is especially useful for tracking progress or recording specific customer requirements.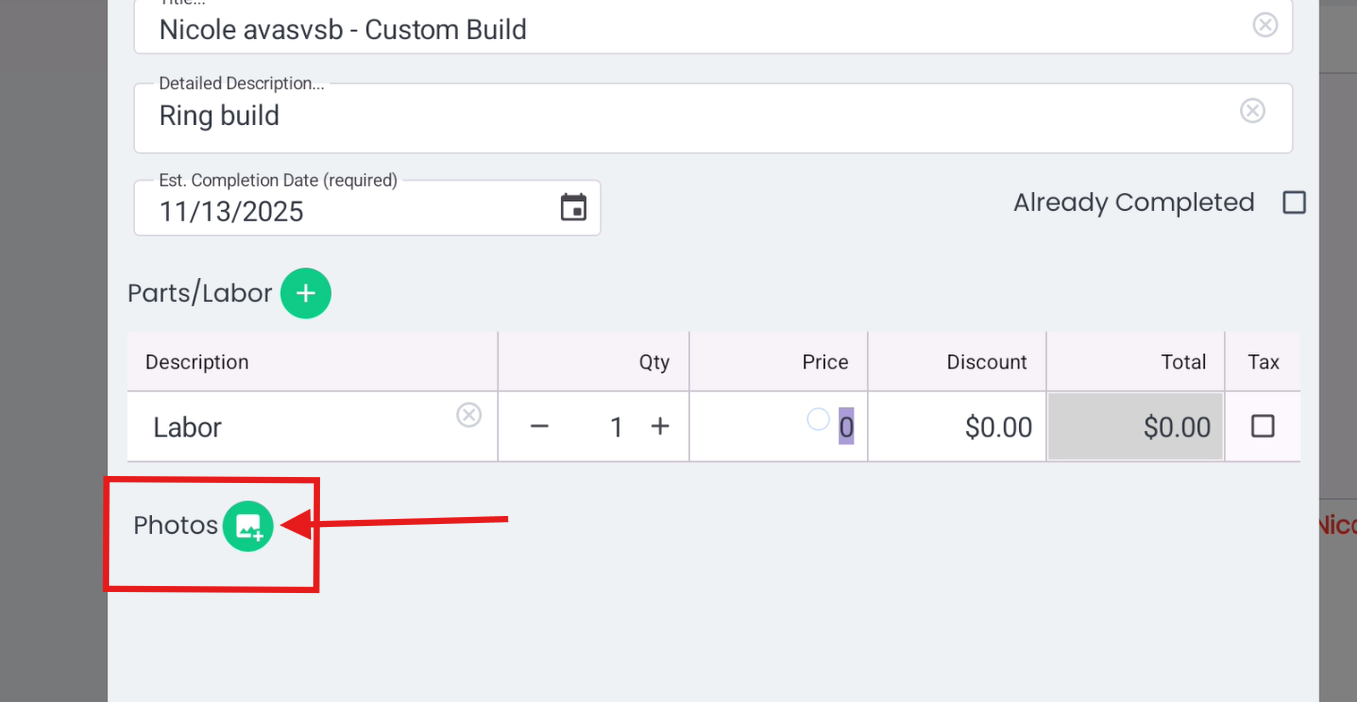
Step 6: Save and review
Once all details are entered, review the build summary to ensure all parts, labor, and costs are correct.
When ready, process the build as you'd with any other type of sale.

This new workflow streamlines tracking, invoicing, and record-keeping for custom projects — making it easier to manage both production and billing in one place.
Troubleshooting
If the Build icon doesn’t appear, ensure your app is updated to the latest version.
Double-check that the salesperson is clocked in and has access to the Services module.
If you can’t add photos, confirm your device permissions for camera and storage are enabled.
Was this article helpful?
That’s Great!
Thank you for your feedback
Sorry! We couldn't be helpful
Thank you for your feedback
Feedback sent
We appreciate your effort and will try to fix the article