This article provides a guide on connecting Google Calendar to Flawless POS. The integration allows external calendar events to appear in Flawless POS and lets Flawless bookings sync to the connected Google Calendar.
Step 1: Open the Google Calendar Integration
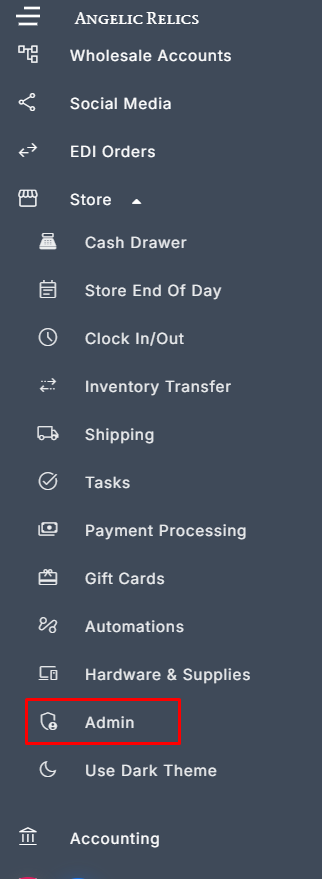
- Open the left navigation menu.
- Go to Admin.
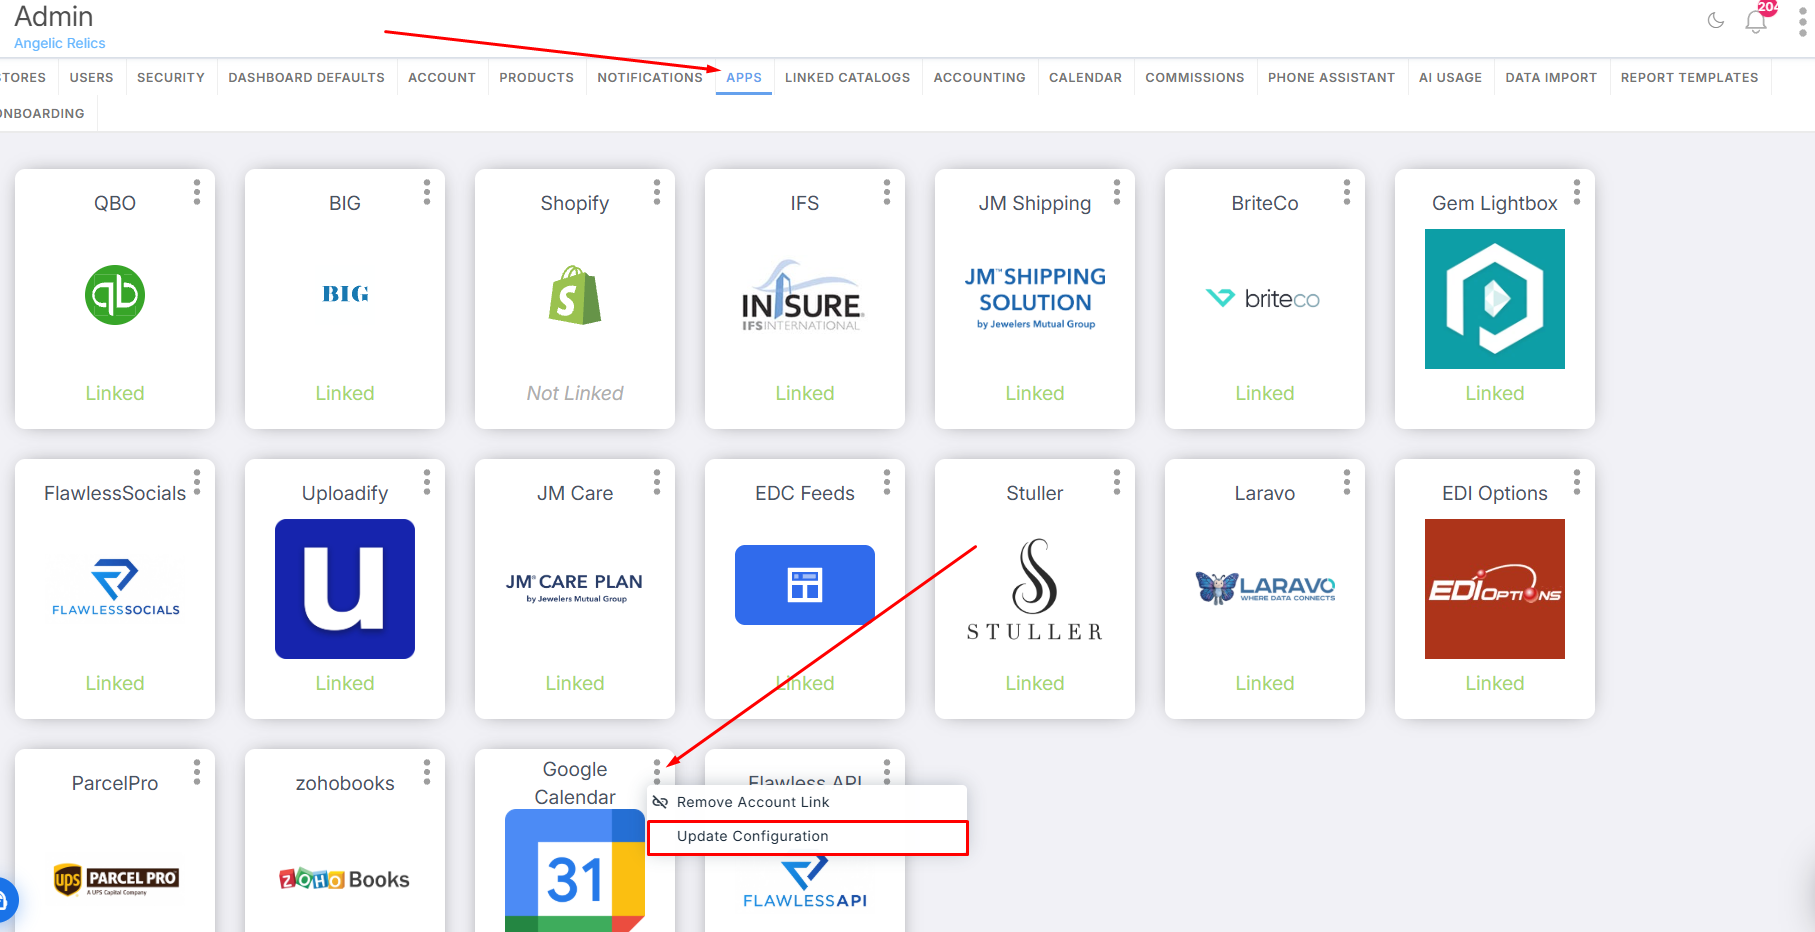
- Select Apps.
- Locate Google Calendar.
- Click the three-dotted button in the top-right corner of the Google Calendar app.
- Select Update Configuration.
Step 2: Connect a Google Account
Connect the Google account that will be used for the calendar integration.
Once connected, the email address associated with the integration becomes the store’s Calendar Mailbox.
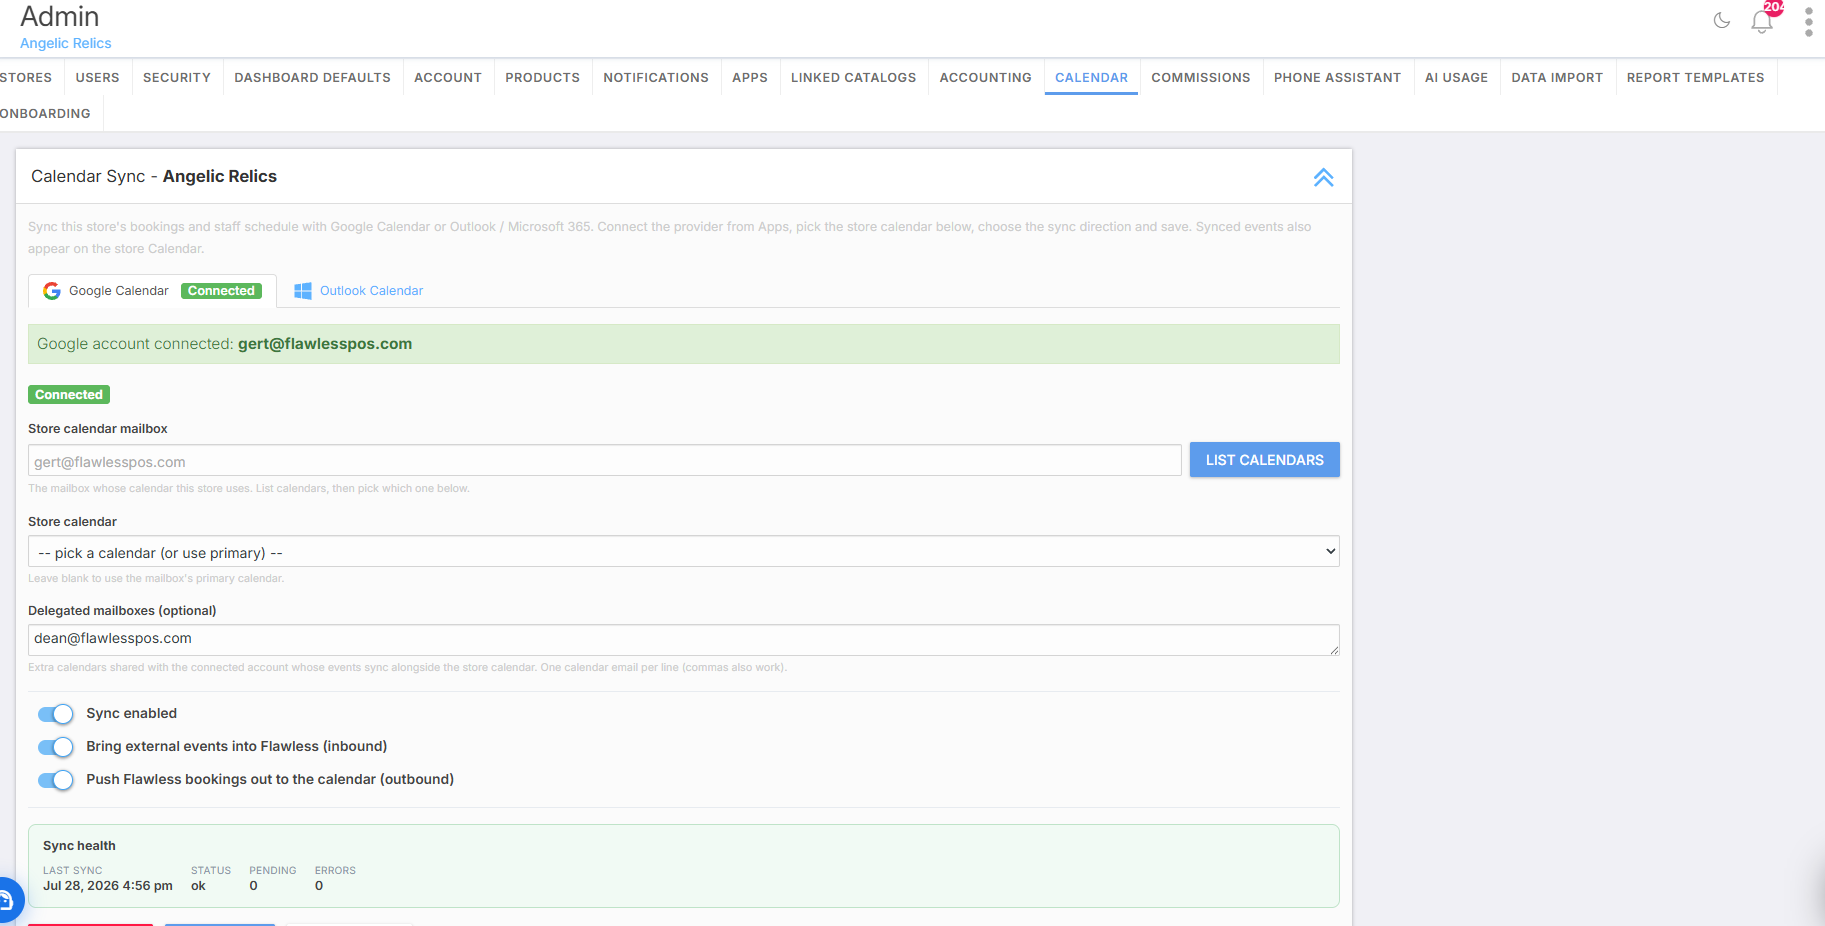
This is the mailbox whose calendar will be used for the store’s calendar synchronization.
Step 3: Select the Store Calendar
Under Store Calendar Mailbox, confirm the connected email address.
Next, click List Calendars beside the Store Calendar field. This will load the calendars available under the connected Google account.
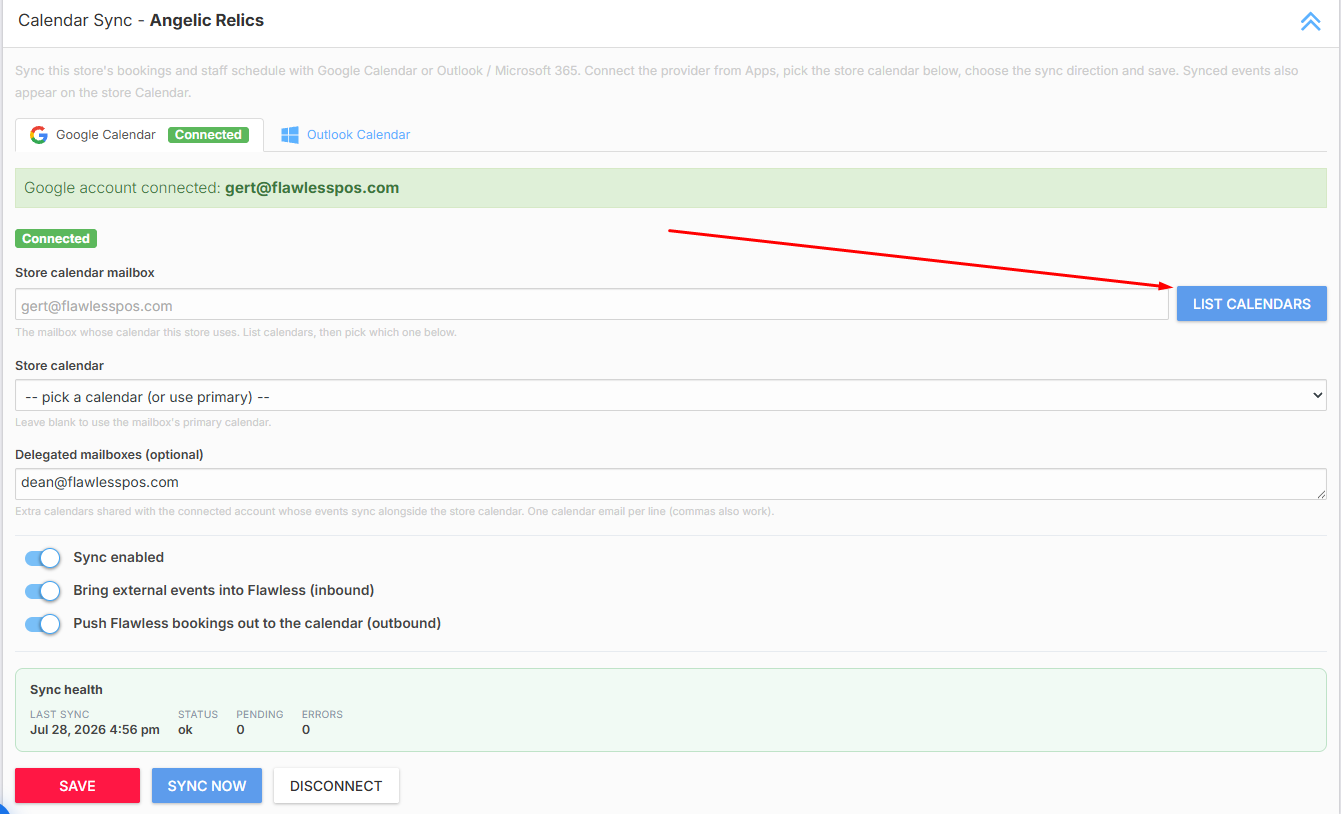
Use the Store Calendar dropdown to select the calendar you want Flawless POS to use.
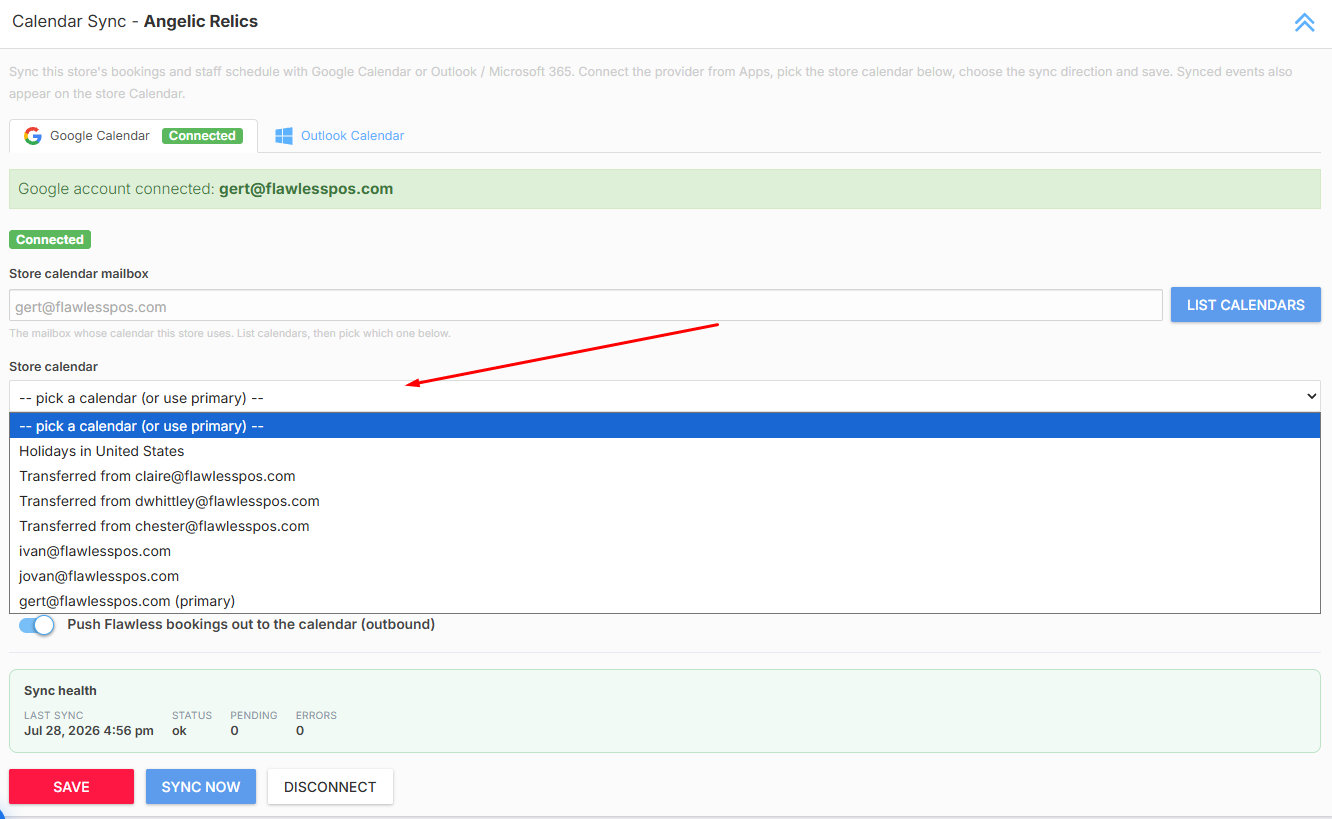
Note: Leaving the Store Calendar field blank will use the connected mailbox’s primary calendar.
Step 4: Add Delegated Mailboxes
The Delegated Mailboxes field is optional.
Delegated mailboxes are additional calendars that have been shared with the connected Google account. Events from these calendars can sync alongside events from the selected Store Calendar.
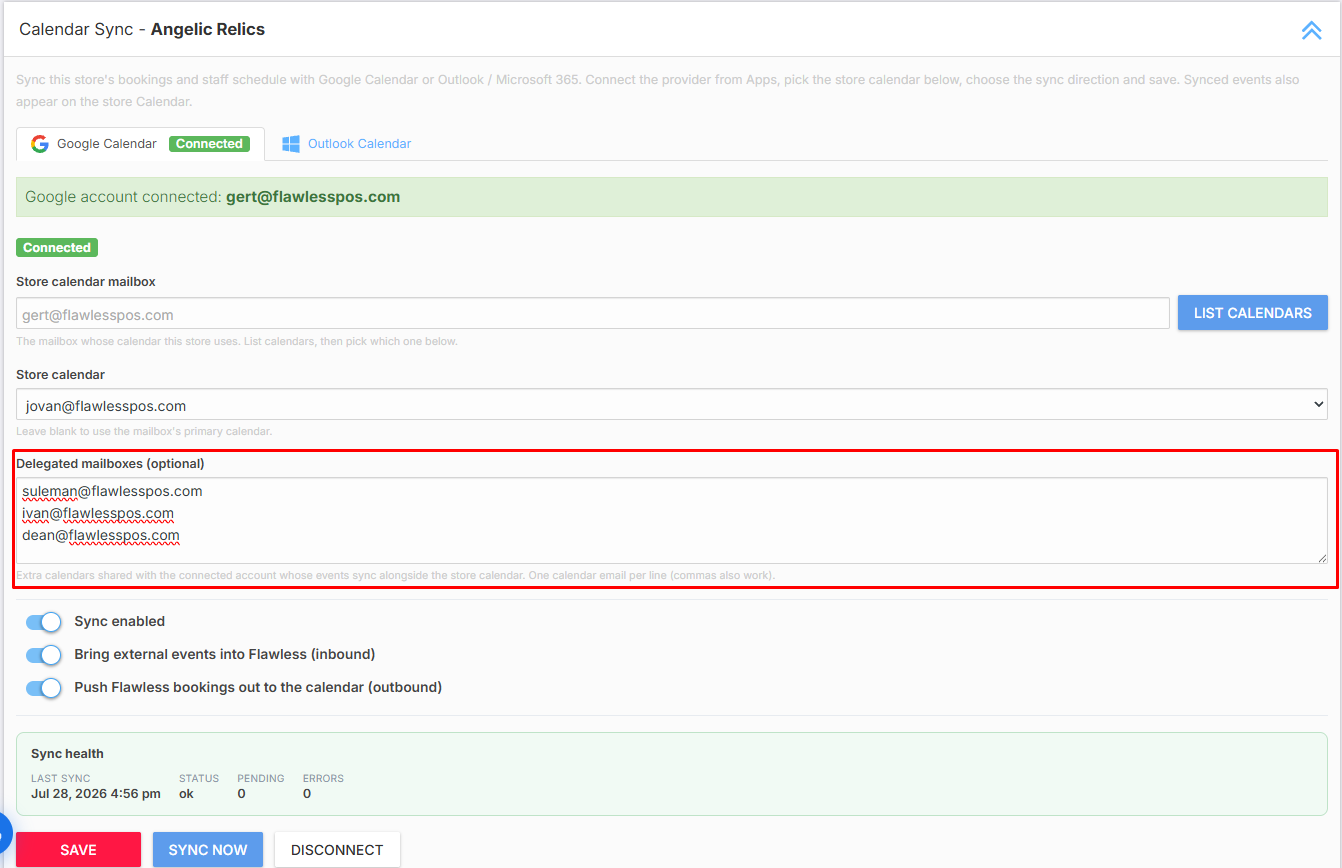
Note: Enter one calendar email address per line. Multiple email addresses may also be separated by commas.
Step 5: Configure the Sync Options
Use the available sliders to control how the calendar integration works.
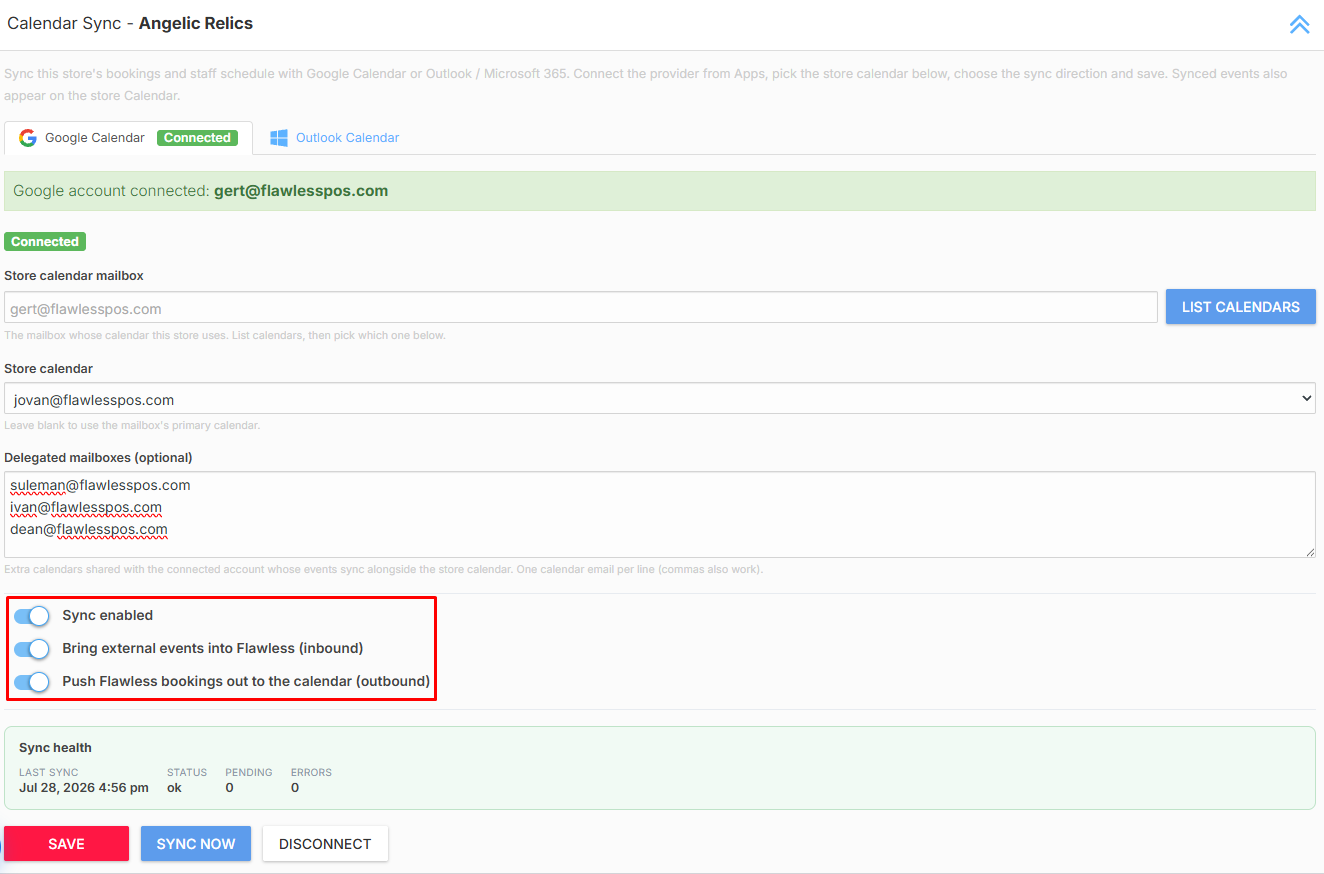
Sync Enabled
Turn this option on to activate calendar synchronization between Flawless POS and Google Calendar.
Bring External Events into Flawless (Inbound)
Turn this option on to bring events created in Google Calendar into the Flawless POS Calendar.
This may include meetings, appointments, Google Meet events, and other events from the selected or delegated calendars.
Push Flawless Bookings Out to the Calendar (Outbound)
Turn this option on to send calendar schedules created in Flawless Calendar to the connected Google Calendar.
Note: When enabling the sync for pushing flawless bookings out to the google calendar, it would take approximately 5 minutes for the schedule to sync with the Google Calendar.
Step 6: Save and Sync the Calendar
Once you are satisfied with the configuration:
- Click Save.
- Click Sync Now.
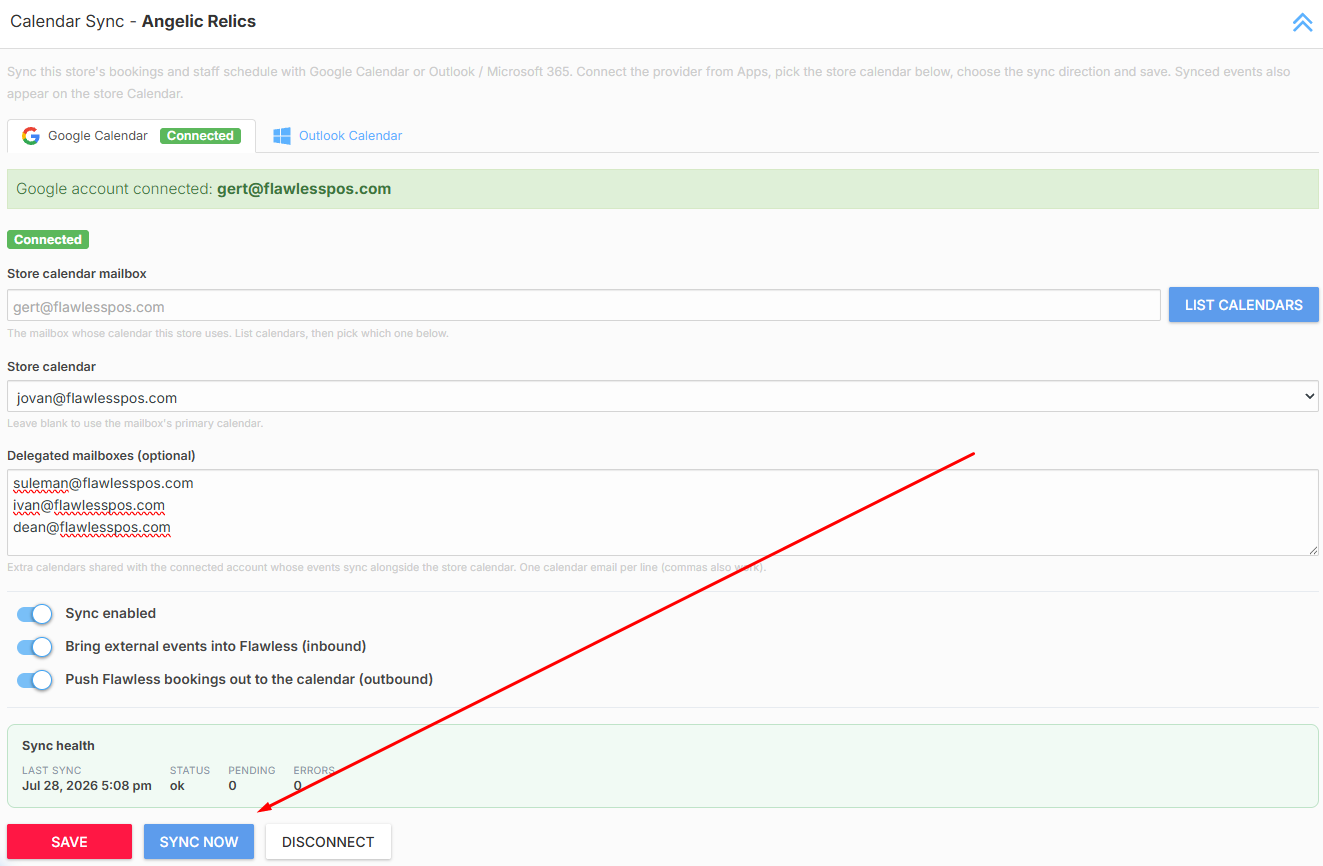
Flawless POS will begin synchronizing events according to the options you selected.
The Sync Health section displays information such as:
- The time of the most recent sync
- Current sync status
- Pending events
- Sync errors
Step 7: Verify Synced Google Calendar Events
To verify the integration:
- Open the Calendar module in Flawless POS.
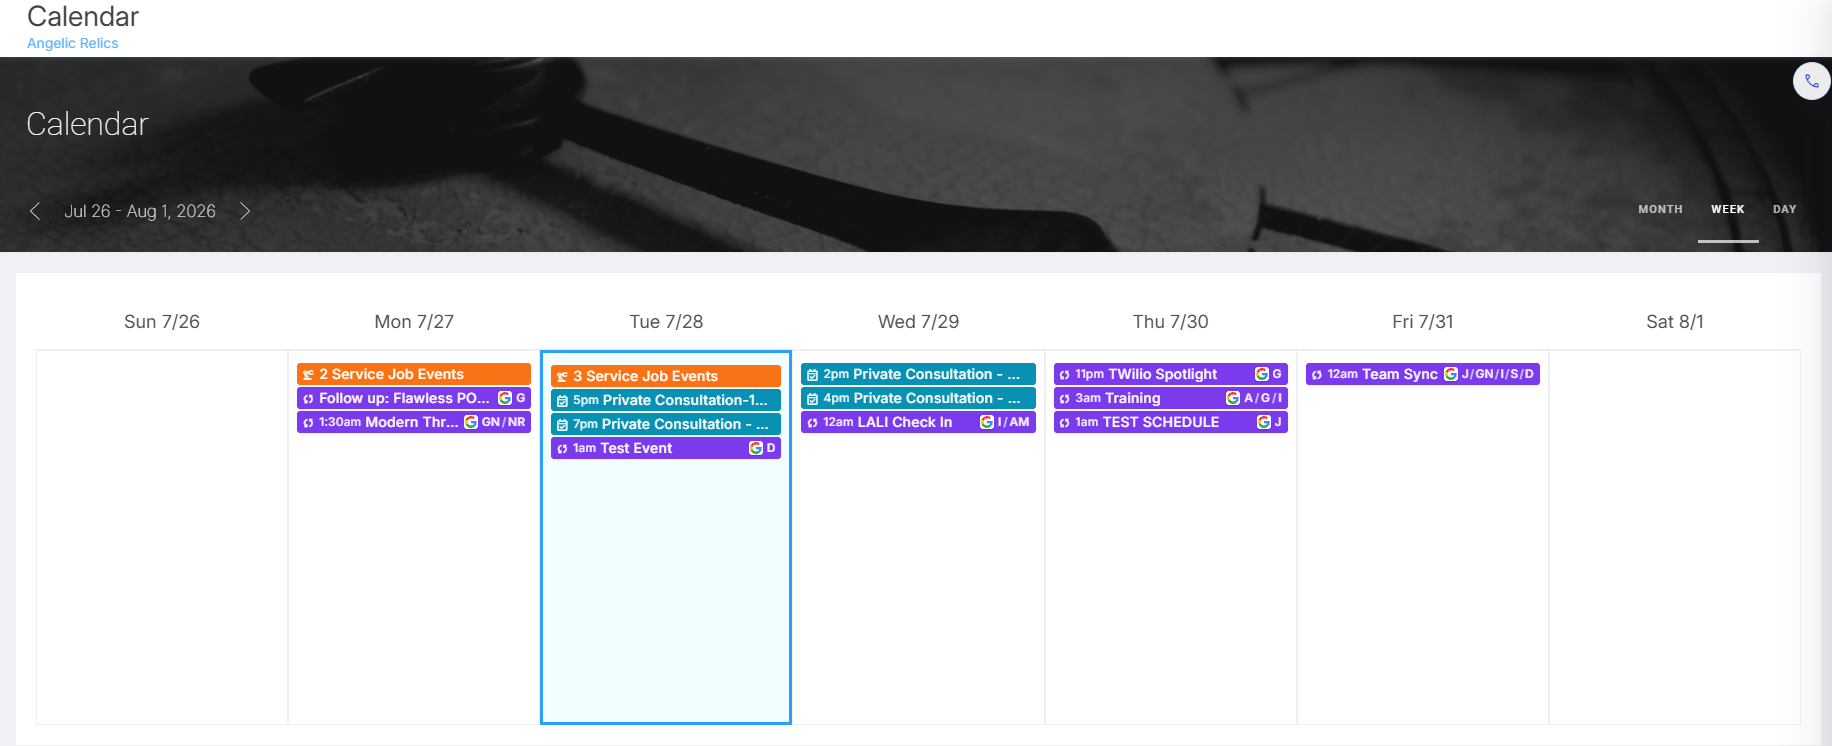
- Locate the events that were synced from Google Calendar.
- Click an event to open its details.
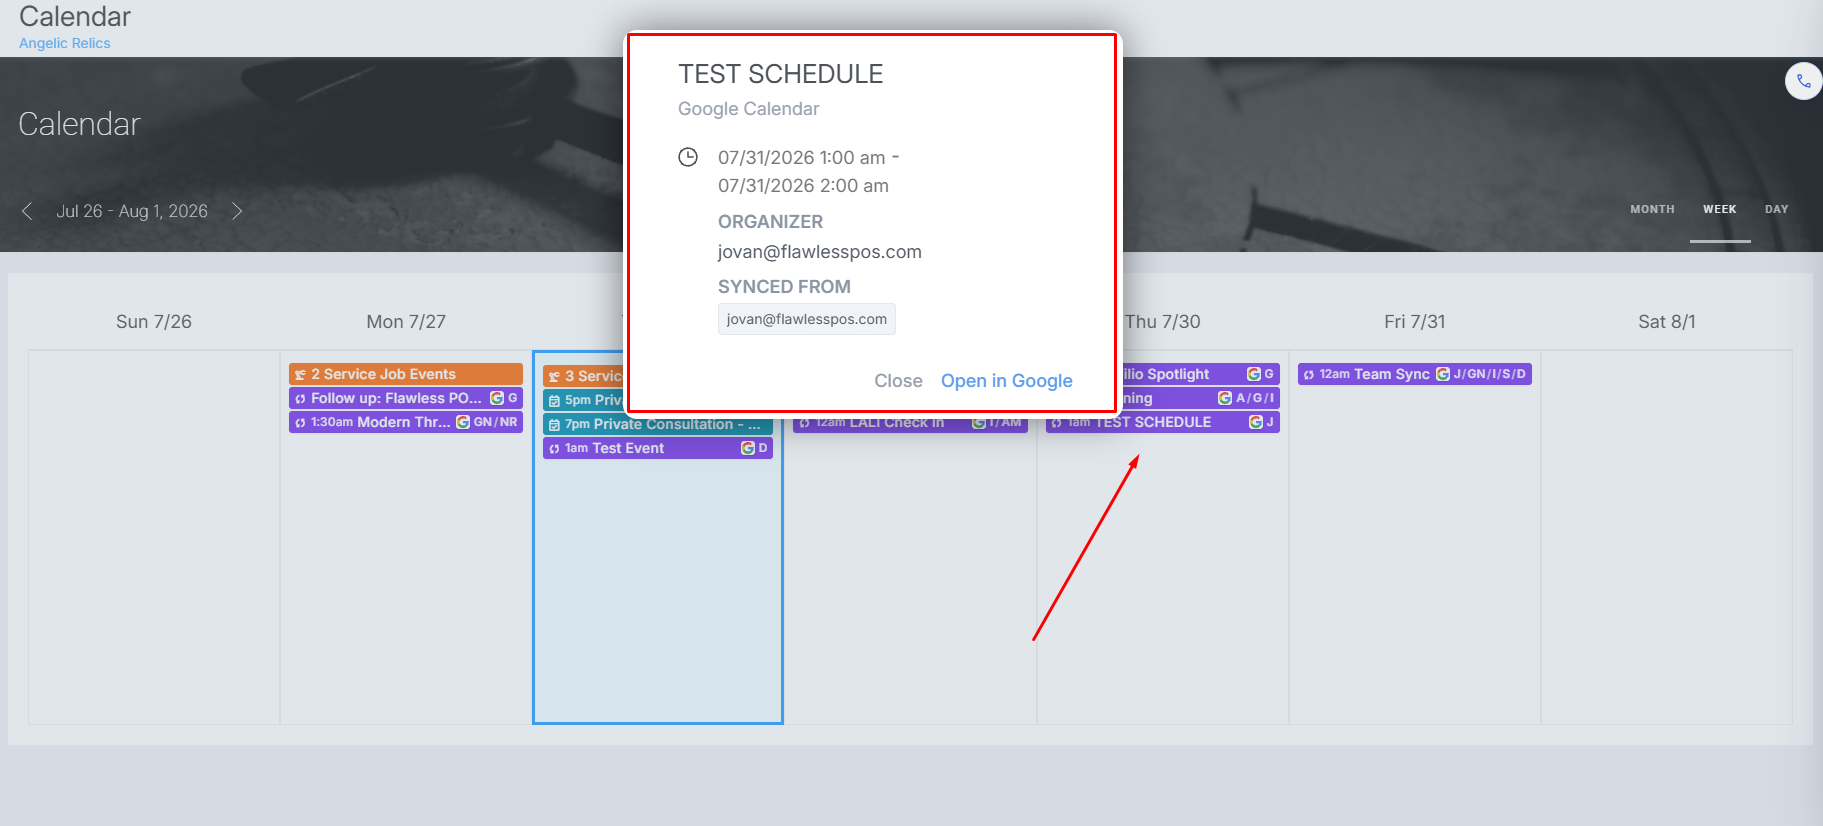
The event details may include the event title, date, time, organizer, attendees, and the account or calendar from which it was synced.
Click Open in Google to view the original event in Google Calendar. From there, you can access any available Google Meet information or other event details.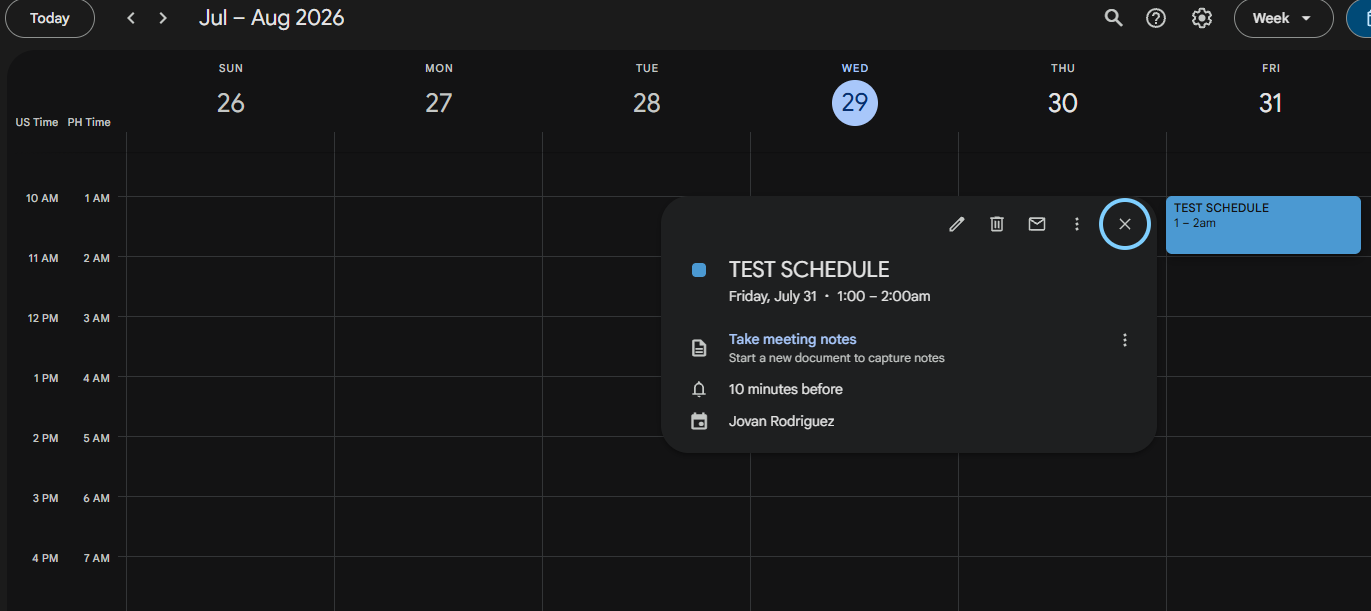
Removing Events from the Calendar
When an event is deleted from Google Calendar, the change will sync back to the Flawless POS Calendar. Once the calendars synchronize, the deleted meeting or event will also be removed from the Flawless POS Calendar.
Step 8: Sync Online Bookings
The Google Calendar integration can also be used with the Flawless POS Bookings module.
After a new online booking is created, it will appear in the Flawless POS booking list and Calendar.
To access the calendar options for a booking:
- Open the Bookings module.
- Locate the booking.
- Click the three-dotted button on the right side of the booking.
- Select Add to Google Calendar.
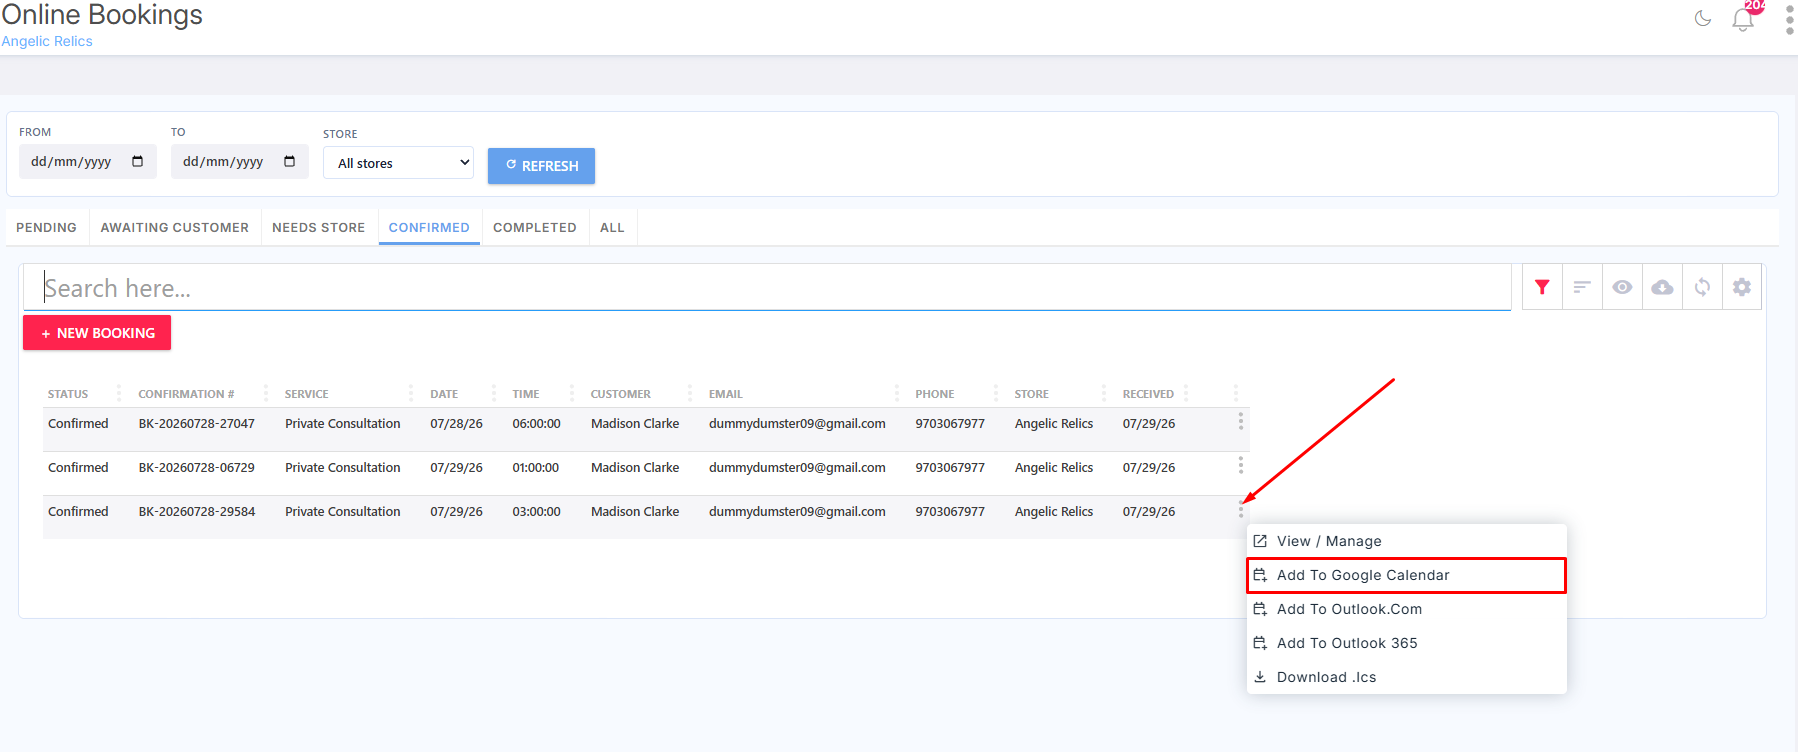
Additional options may also be available for Outlook or downloading the event as an ICS calendar file.
Troubleshooting
For issues with configuring your Google Calendar or adding items, please contact Flawless POS support for further assistance.
Was this article helpful?
That’s Great!
Thank you for your feedback
Sorry! We couldn't be helpful
Thank you for your feedback
Feedback sent
We appreciate your effort and will try to fix the article