This article explains how to receive consignment goods from a customer directly through the Point-of-Sale (POS) module, configure how the items enter inventory, define payout rules, and complete the intake with a signed consignment policy.
Step 1: Open POS and Start Customer Consignment Intake
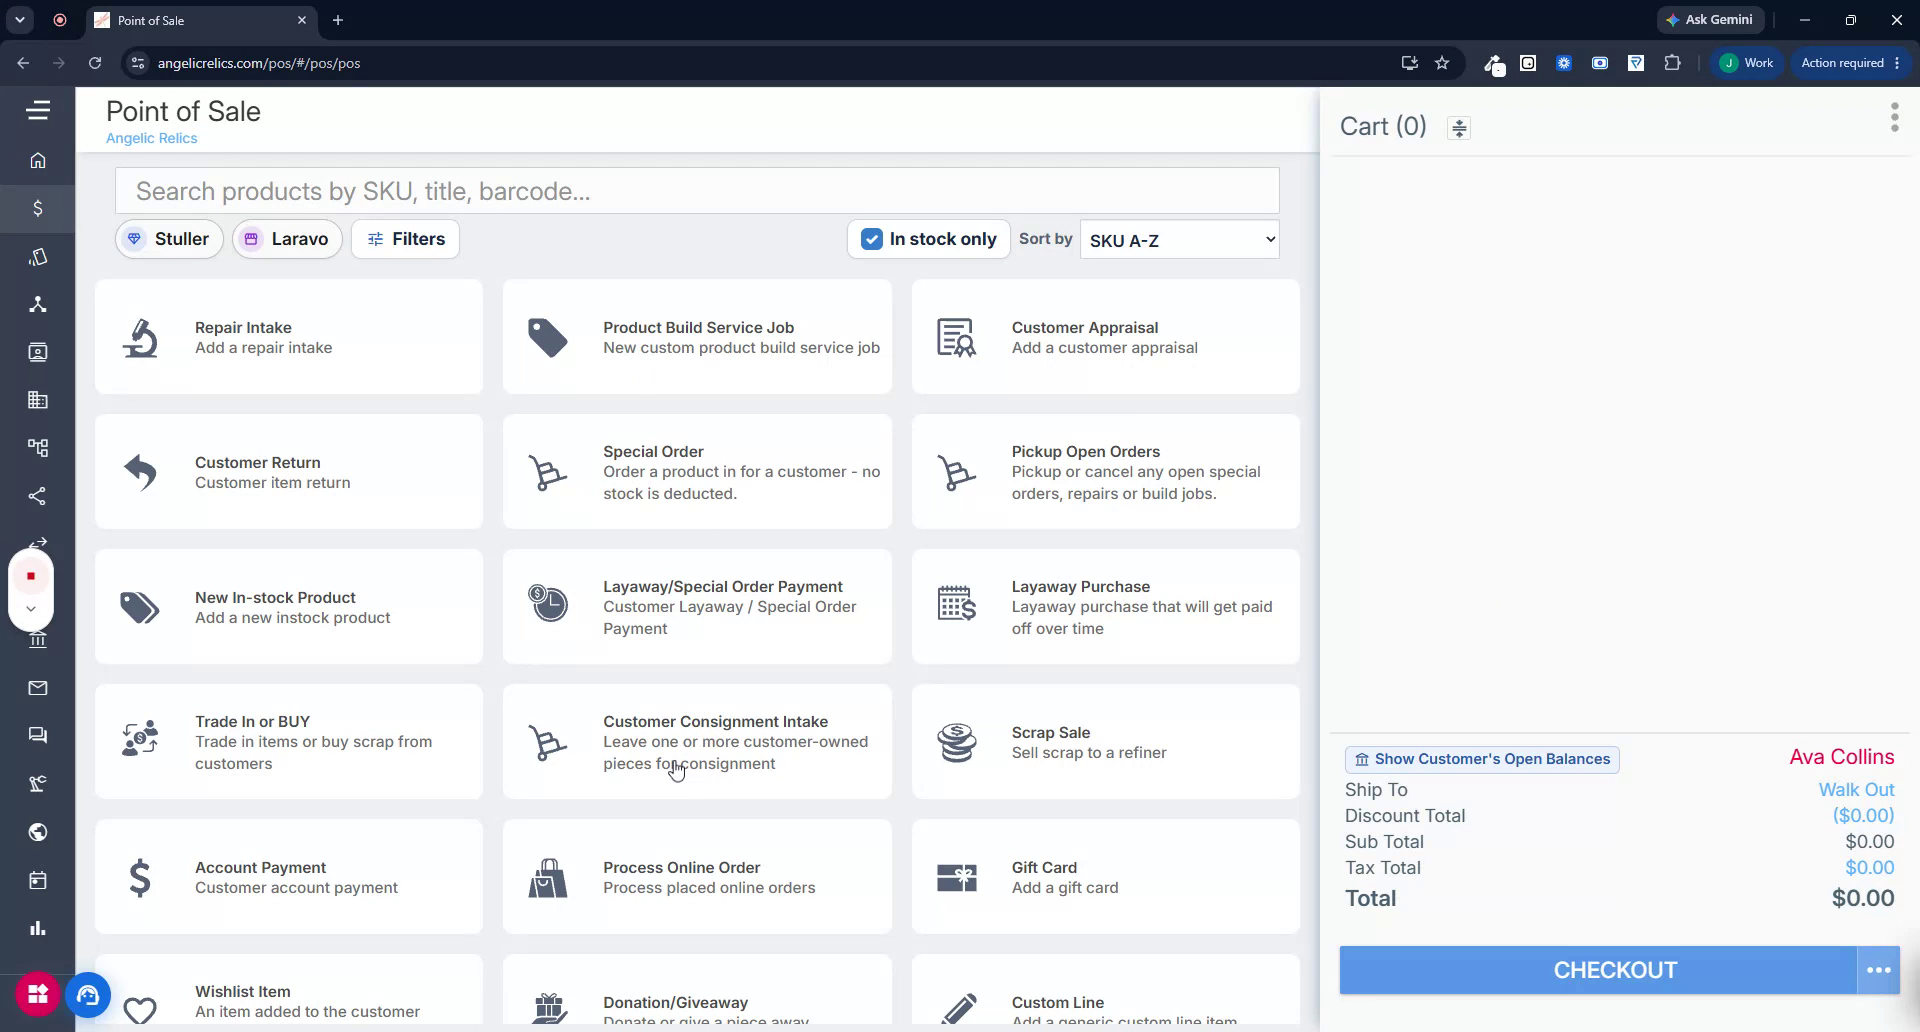
Go to the Point-of-Sale module and select the appropriate customer on the POS screen.
After the customer is selected, click the Customer Consignment Intake button.
Step 2: Choose How the Consigned Product Enters Inventory
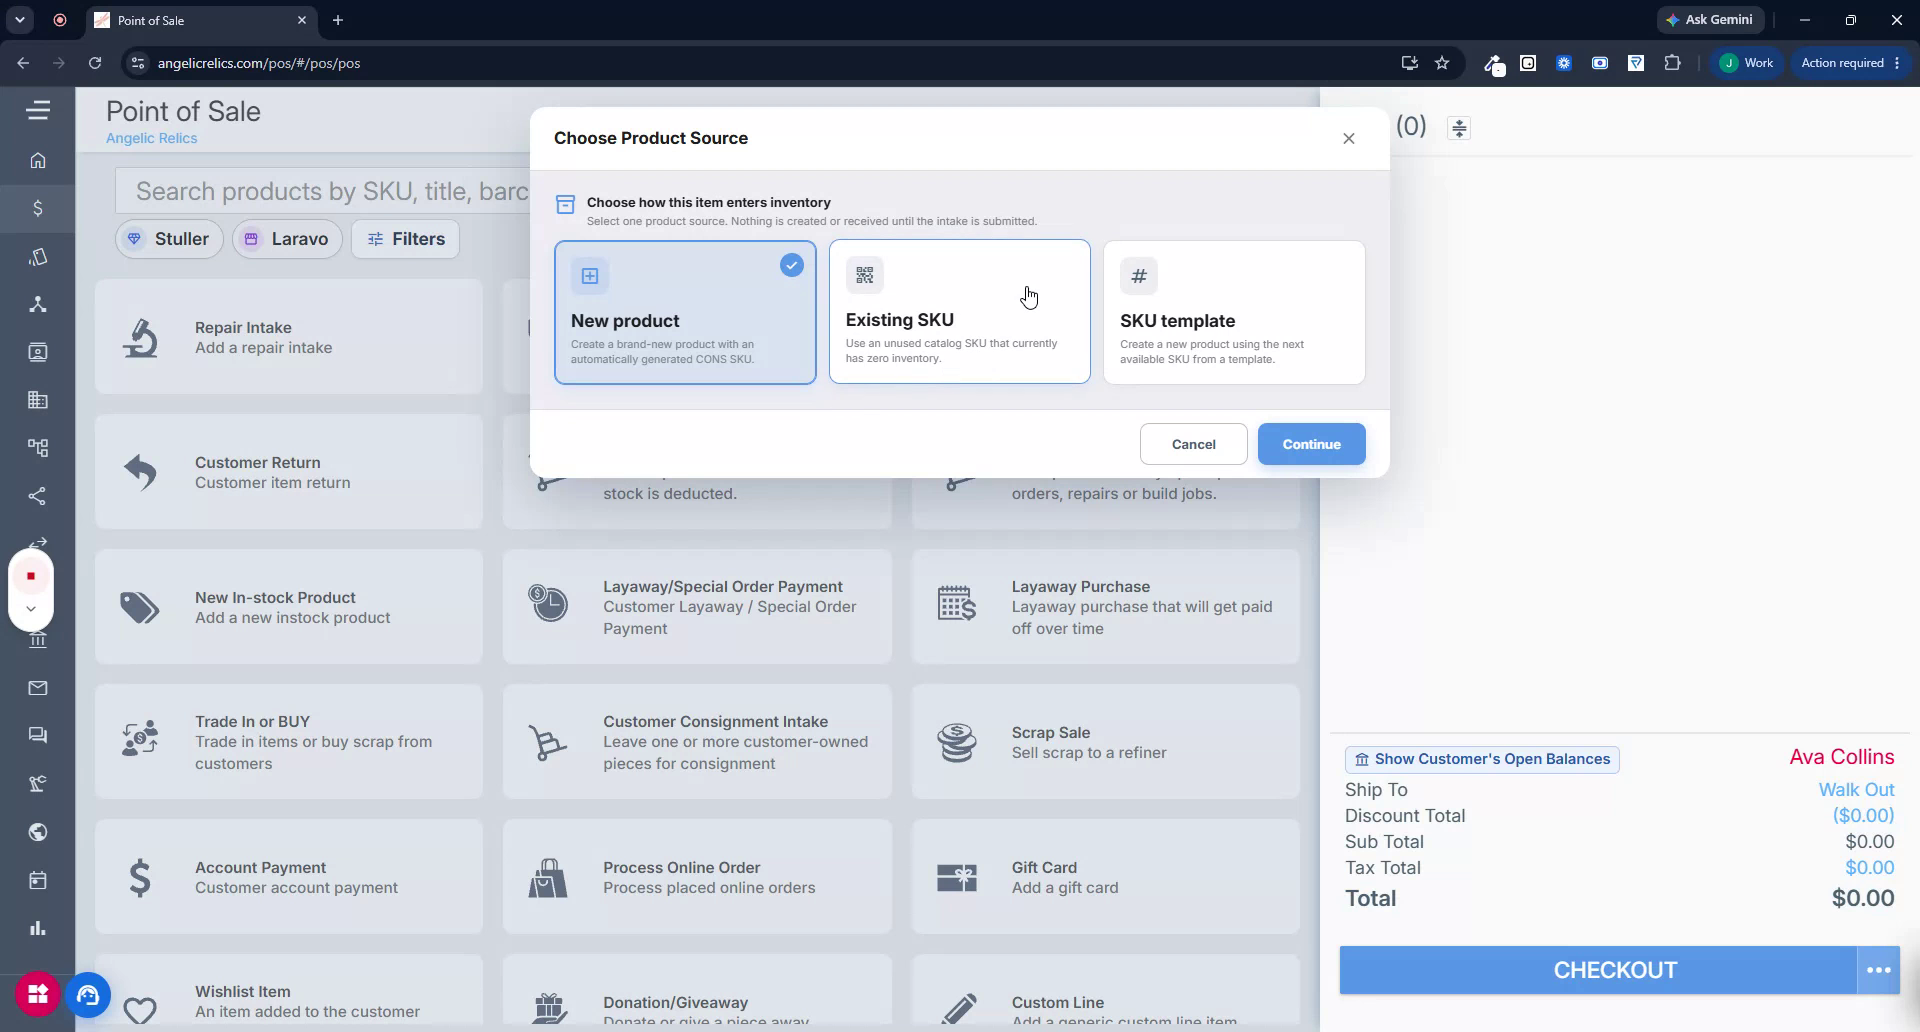
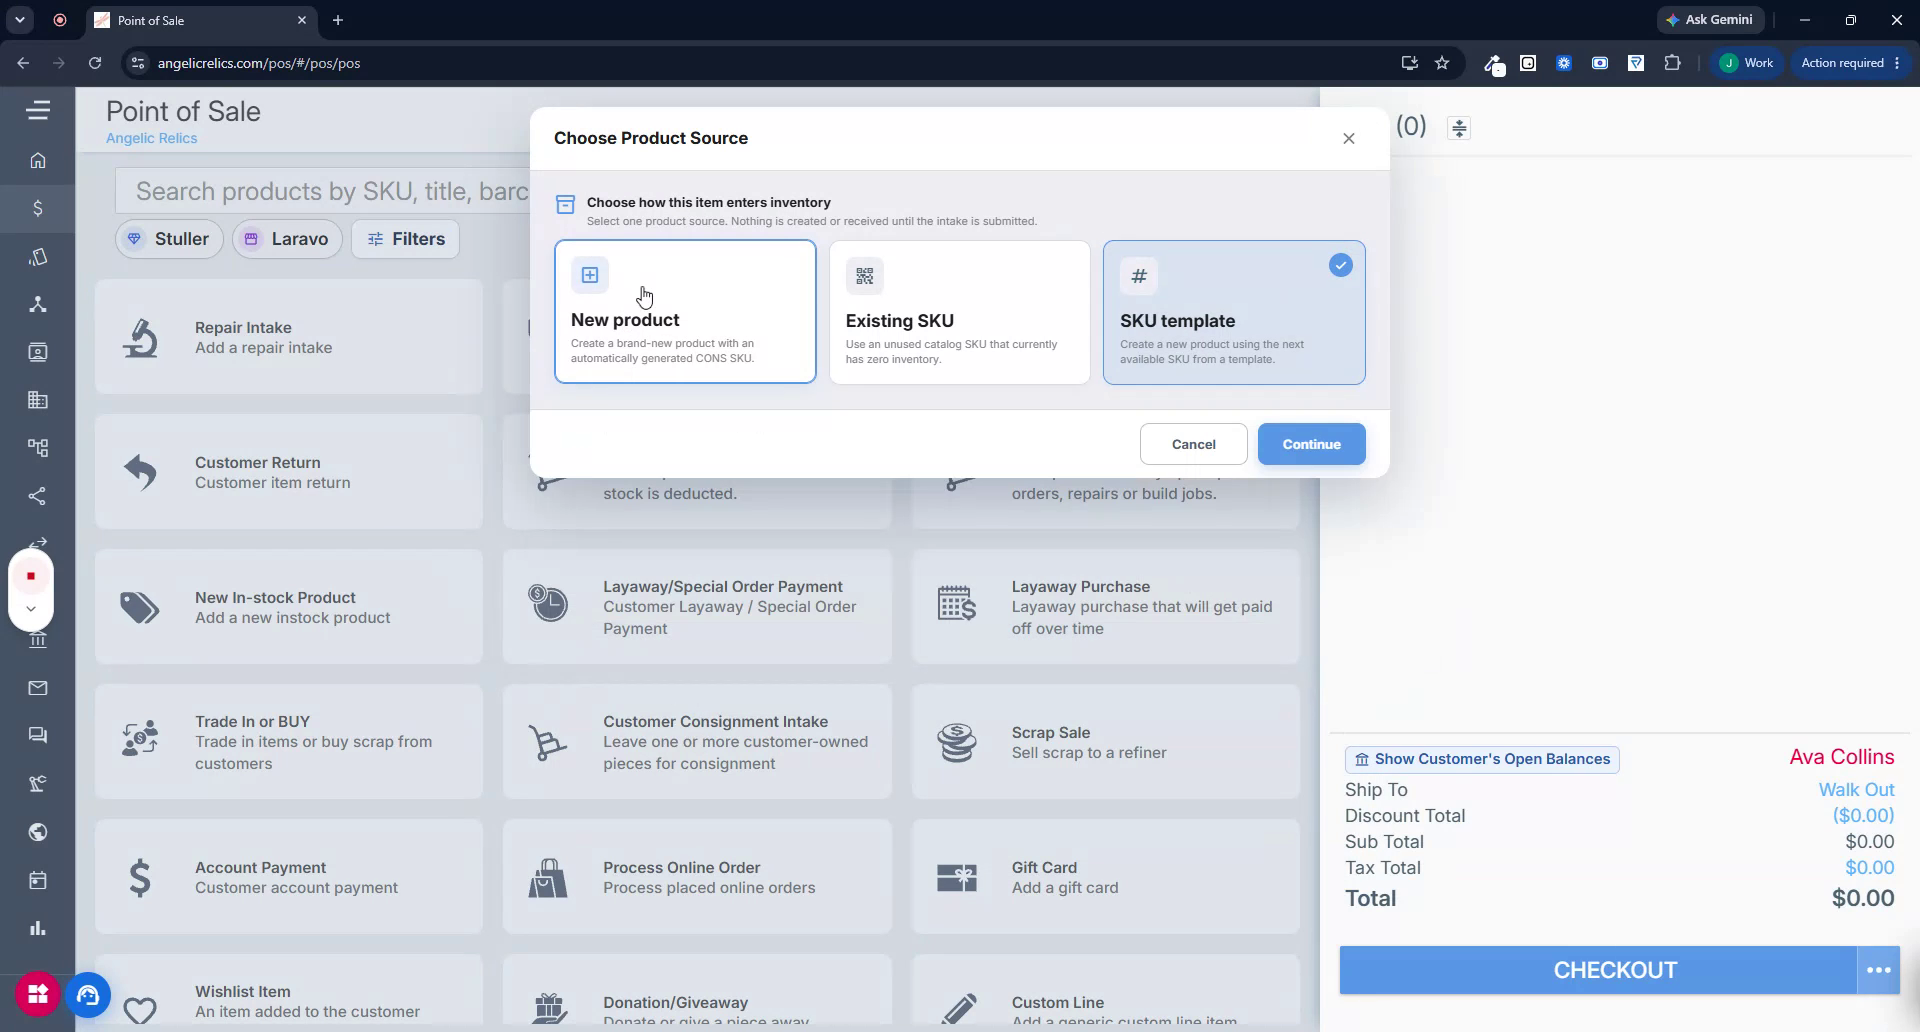
You will be presented with three options for how the consigned product should enter inventory:
New Product – Use this when the customer’s item does not already exist in your inventory. The system will create a new product and automatically assign it a SKU.
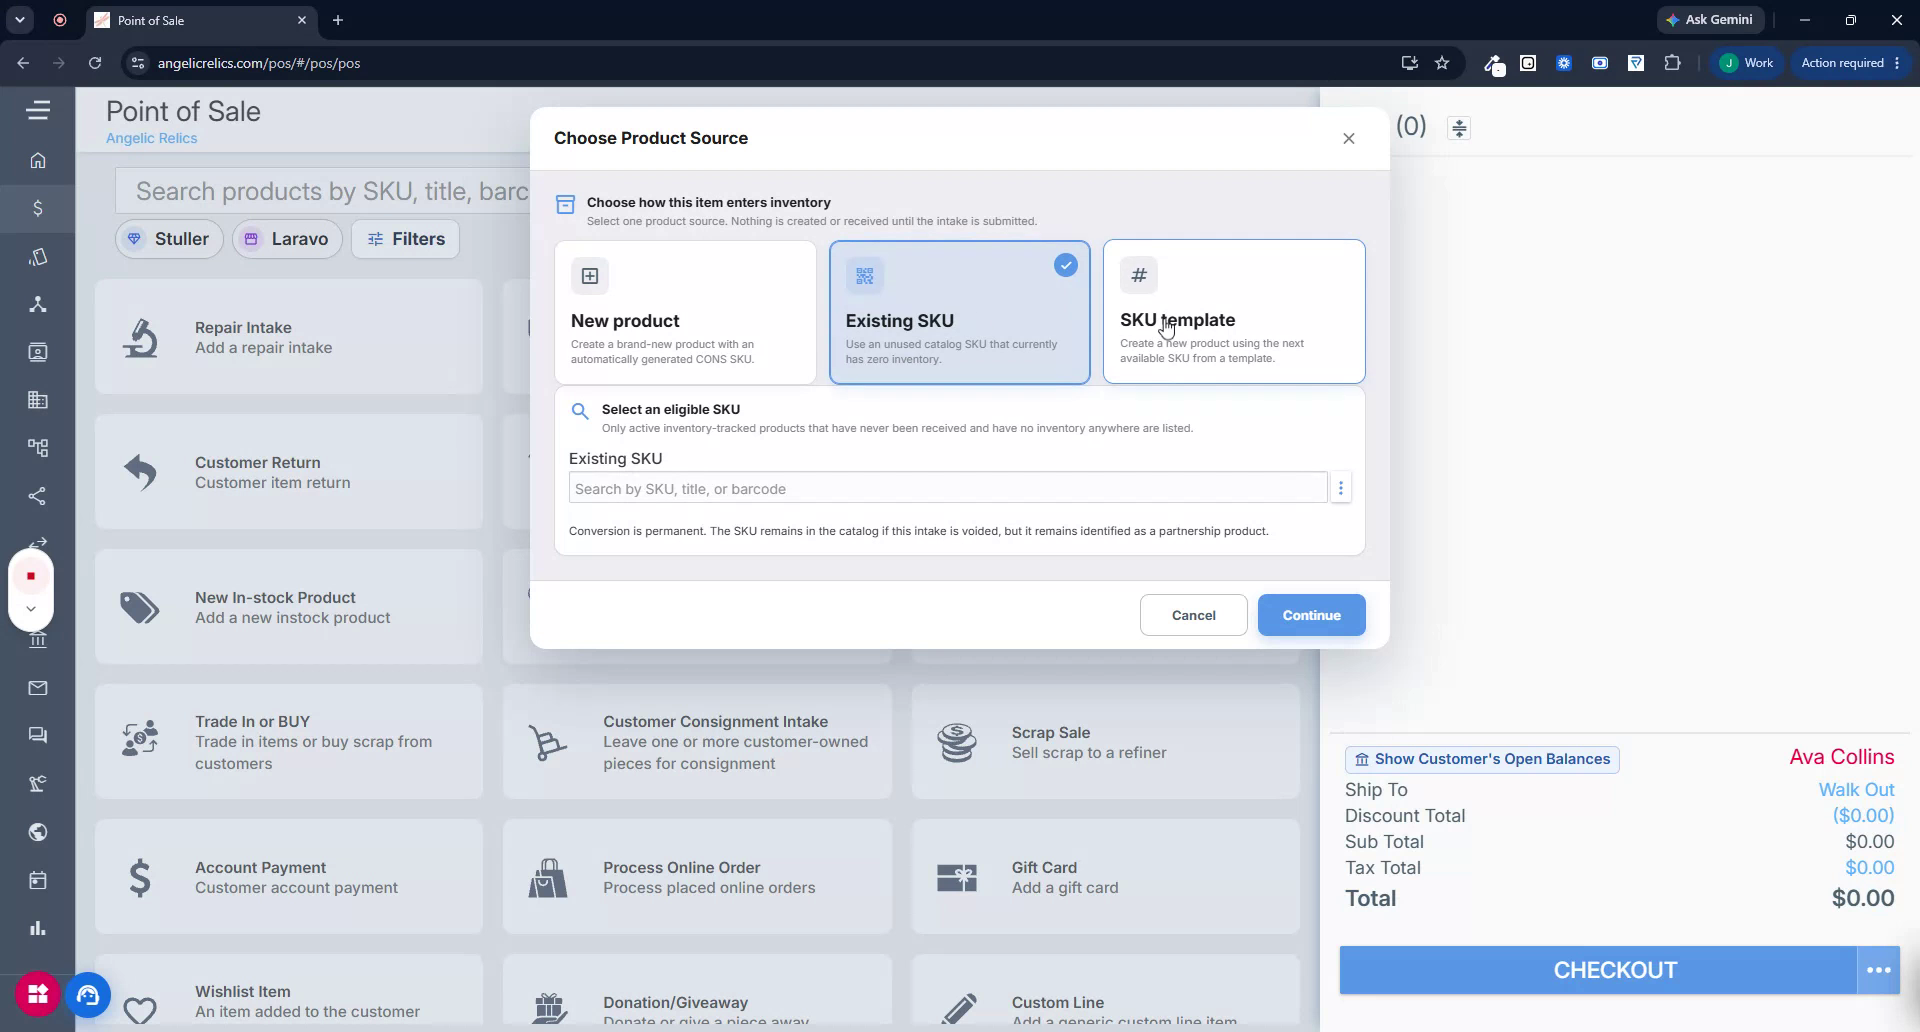
Existing SKU – Use this when the product already exists in the system and you want to use that SKU as a consigned item only.
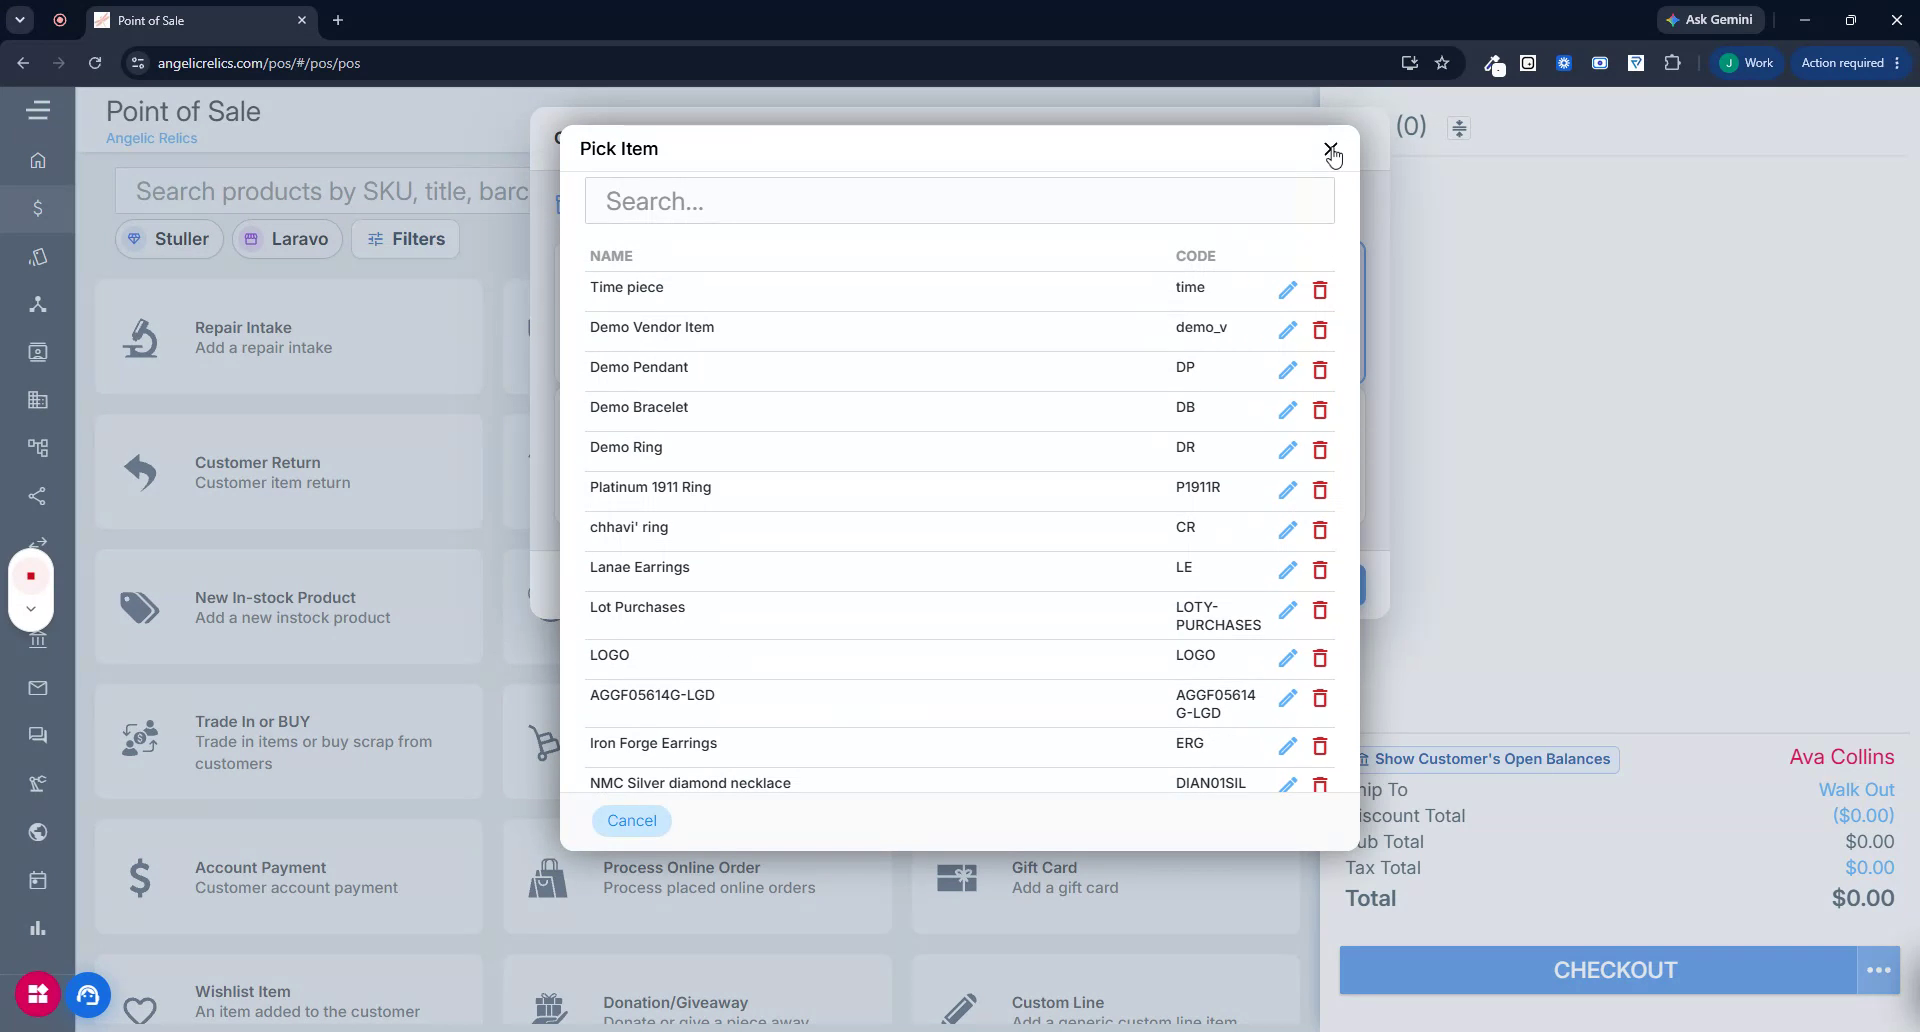
Only inventory-tracked products that have never been received and currently have zero inventory will be available for selection.
SKU Template – Use this to create the consigned product using one of the existing SKU templates configured in the system.
Step 3: Select an Existing SKU Template (If Applicable)
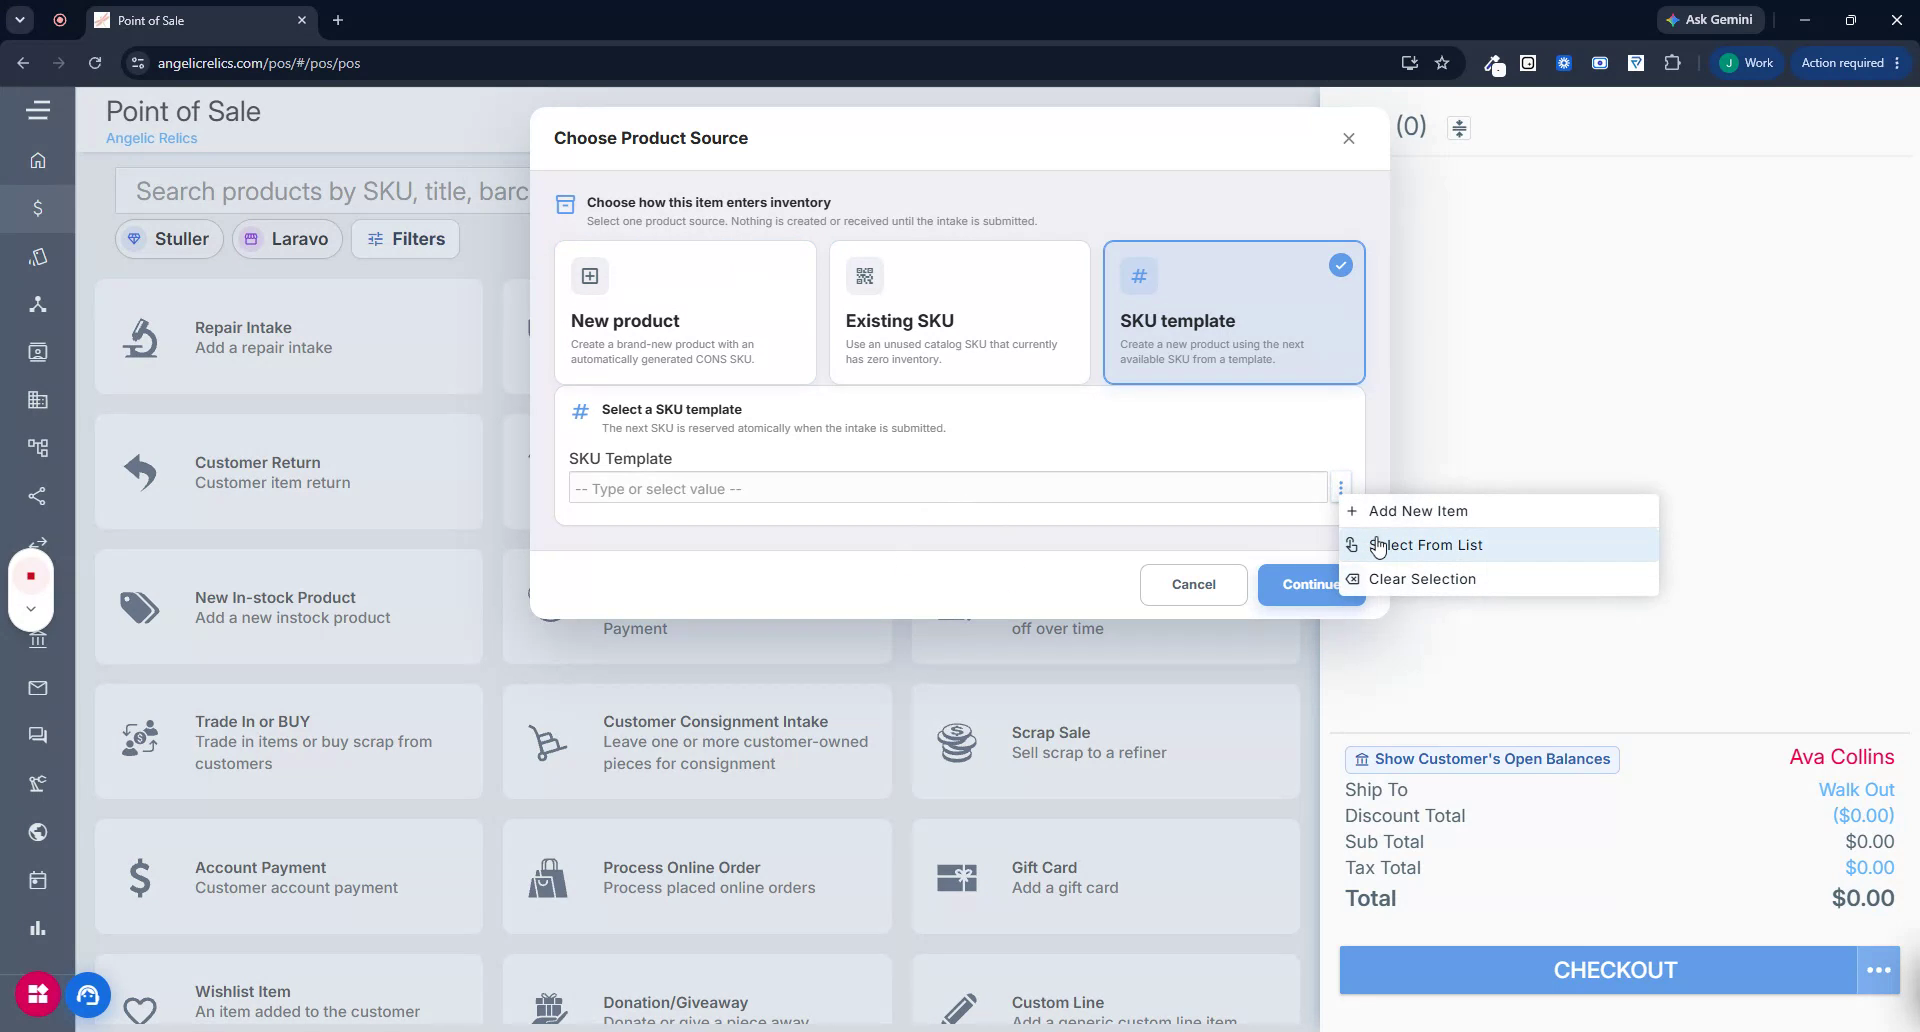
If you choose SKU Template, select the appropriate SKU template from the list of available templates in the system.
Choose the most suitable SKU template for the consigned item based on its attributes and category.
Step 4: Confirm Product Source and Proceed
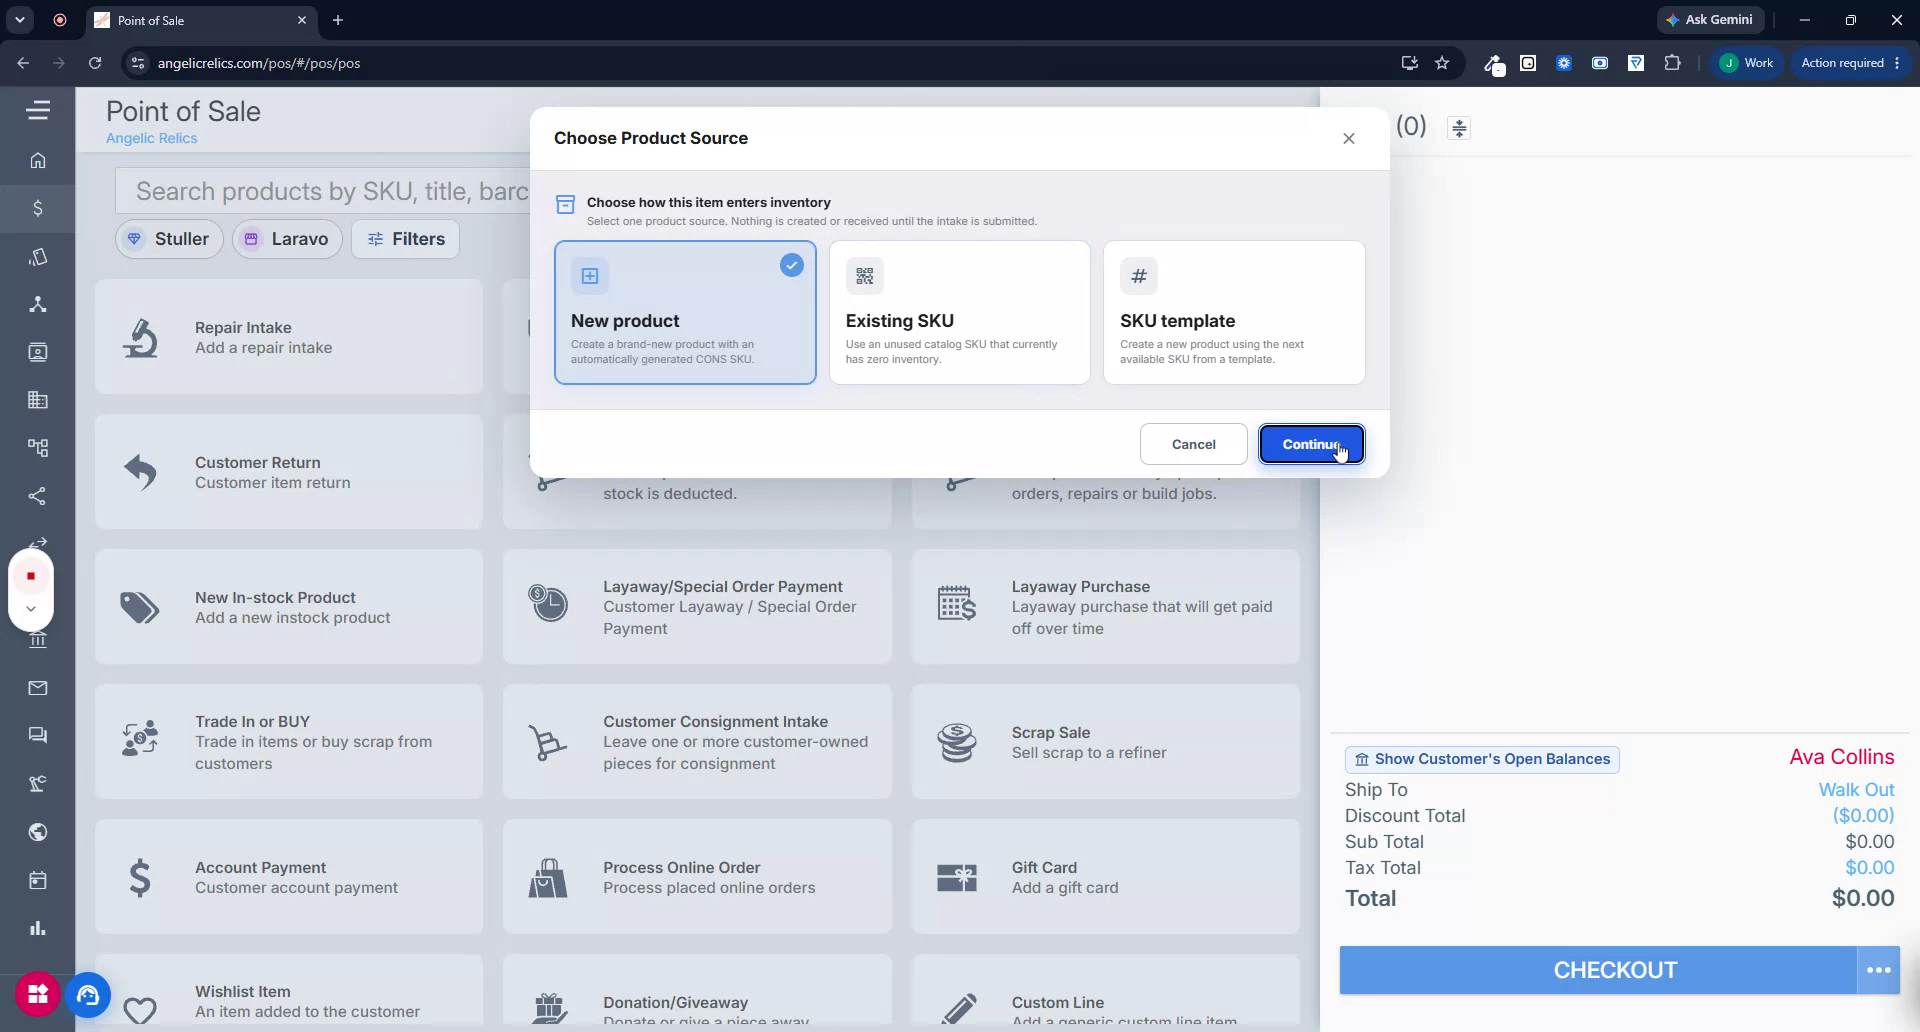
Once you have selected the product source (New Product, Existing SKU, or SKU Template), review your choice.
Click Continue to proceed to the item details screen, where you will enter all consignment item information.
Step 5: Enter New Product Details for the Consigned Item
For this example, select New Product as the product source.
On the product details screen, enter the following information:
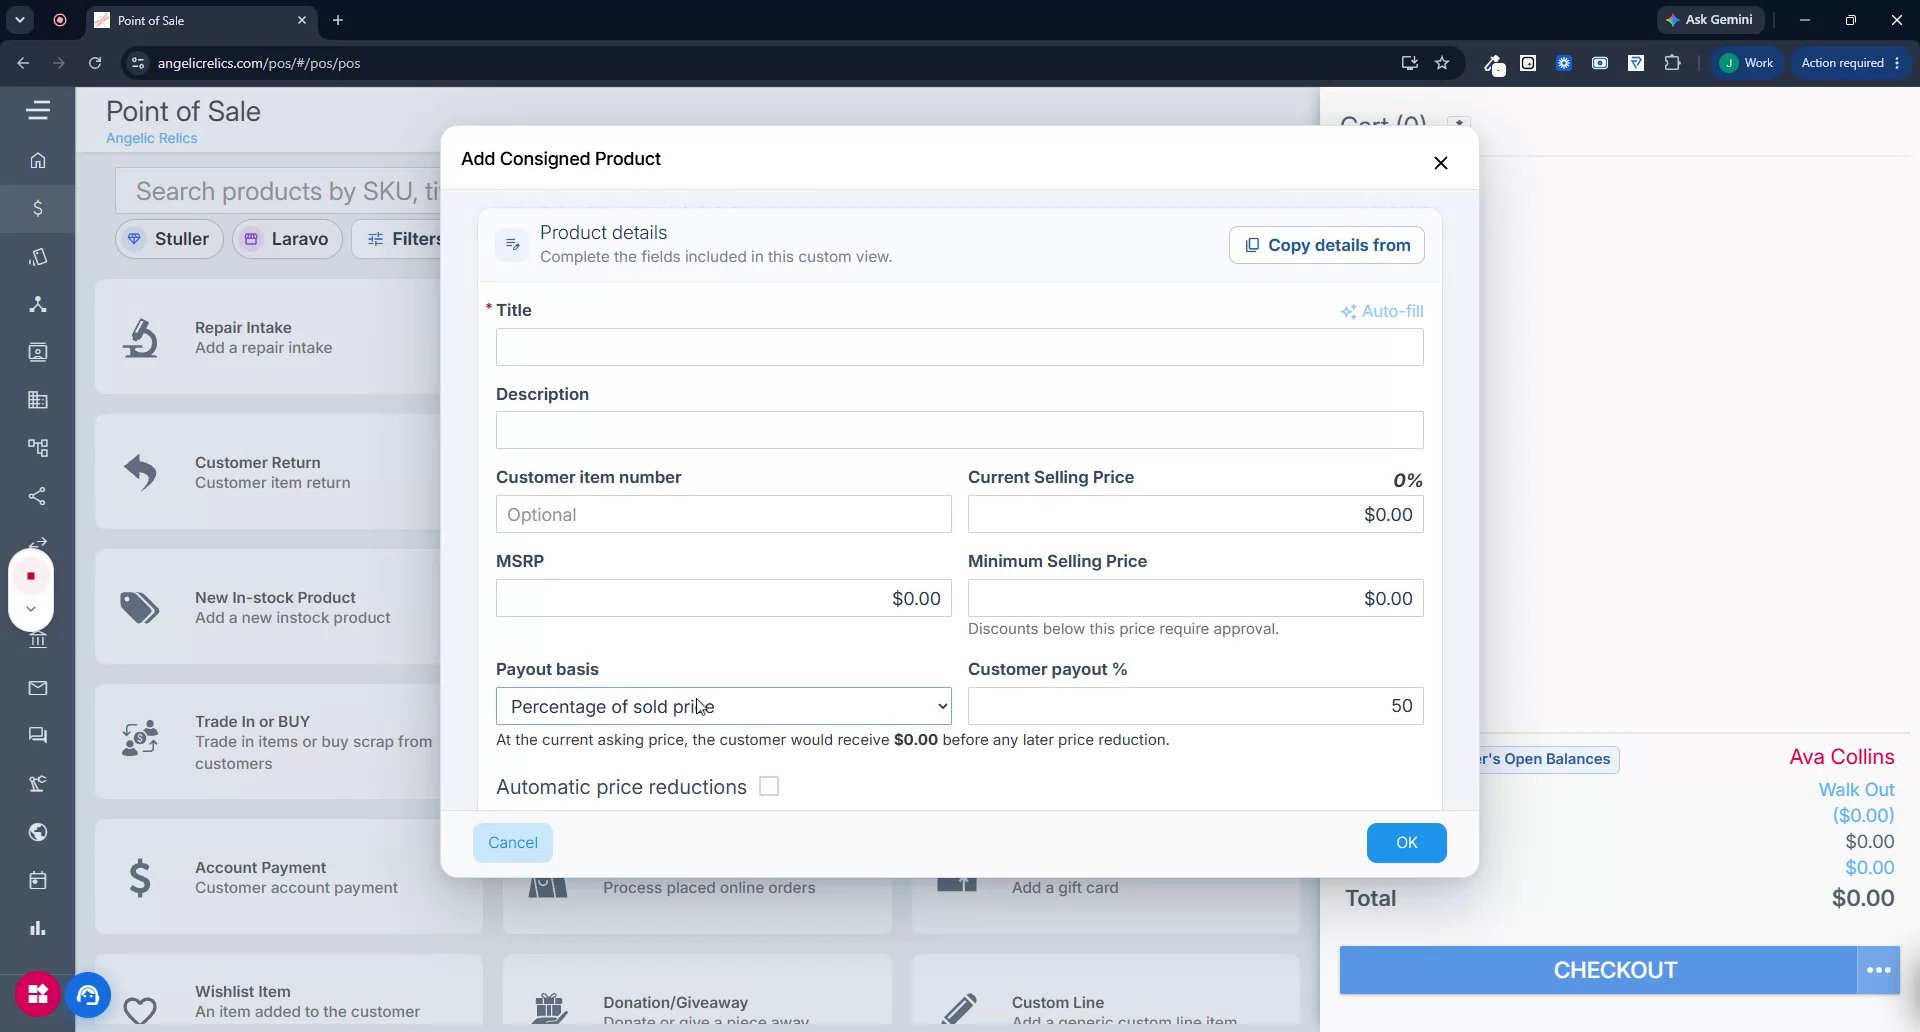
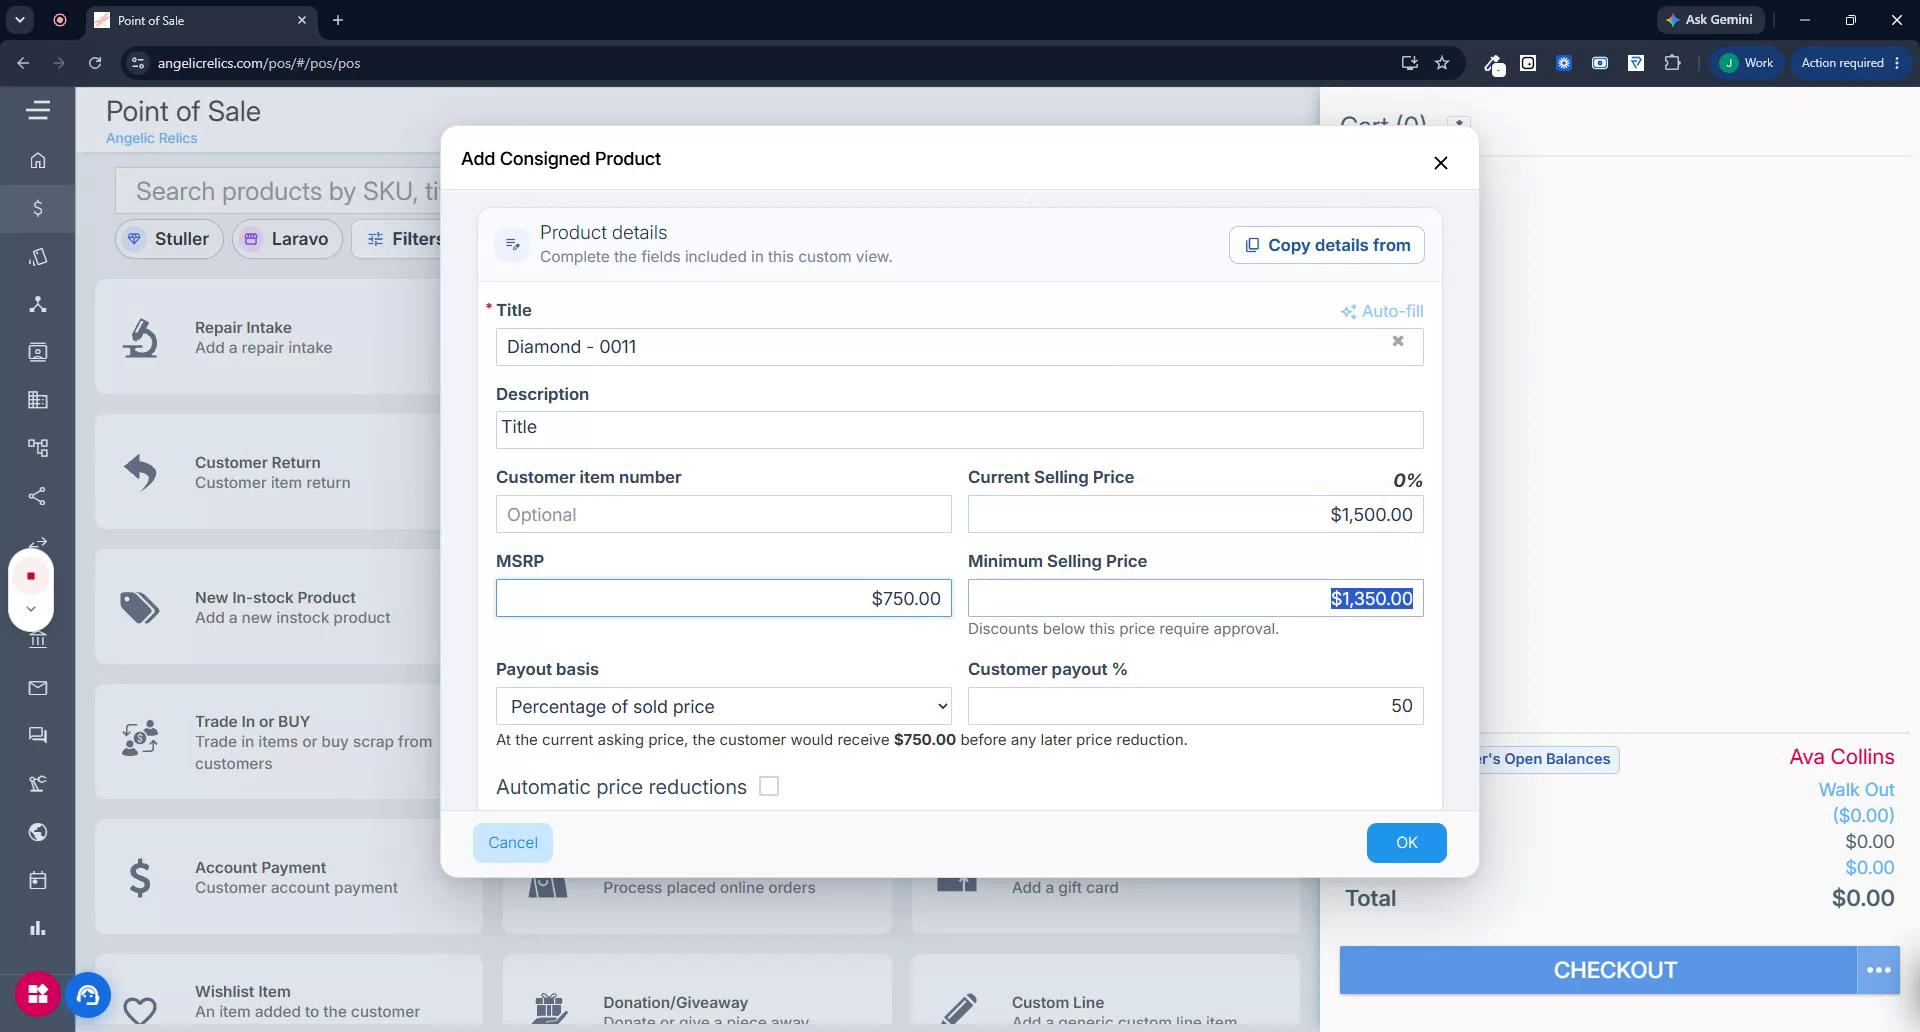
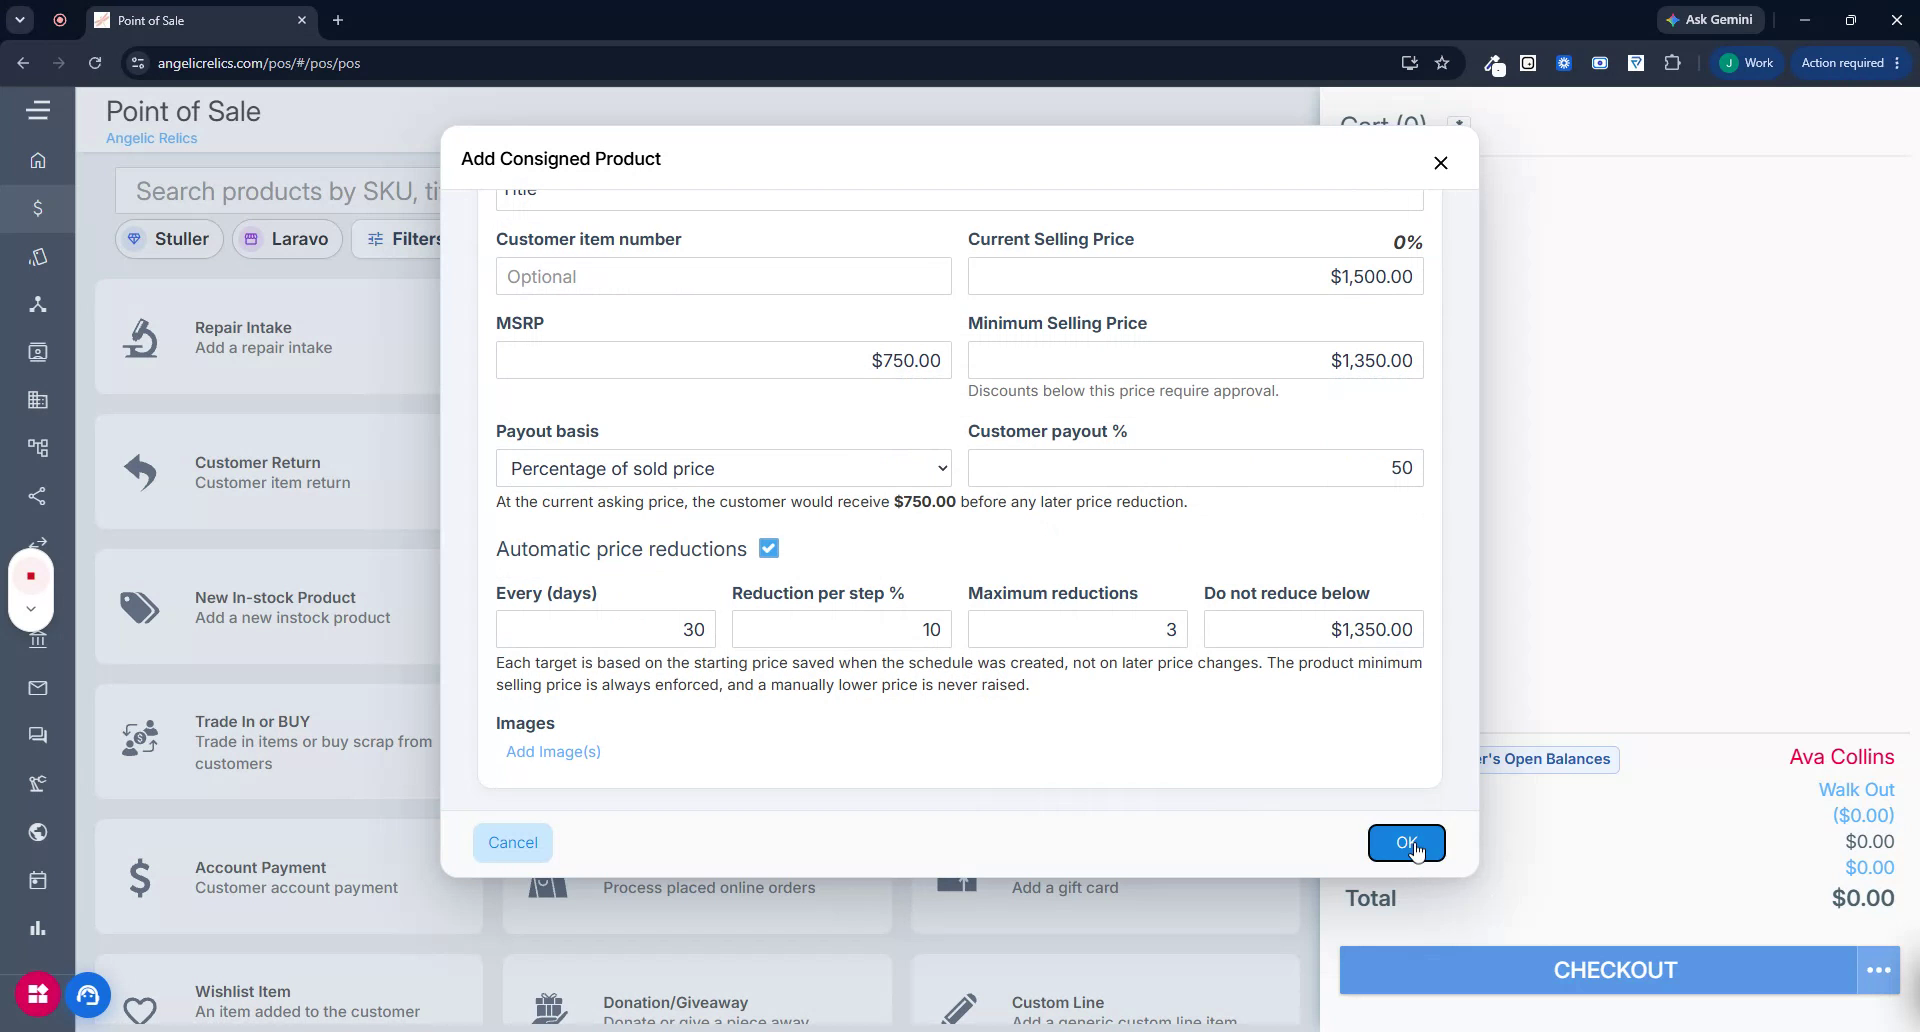
Title – Clear name of the consigned item.
Description – Brief description and any relevant details.
Customer Item Number (optional) – The identifier or tag number provided by the customer.
Current Selling Price – The starting price you intend to sell the item for.
MSRP / Suggested Price – Manufacturer’s suggested retail price, if applicable.
Minimum Selling Price – The lowest allowable selling price for the item.
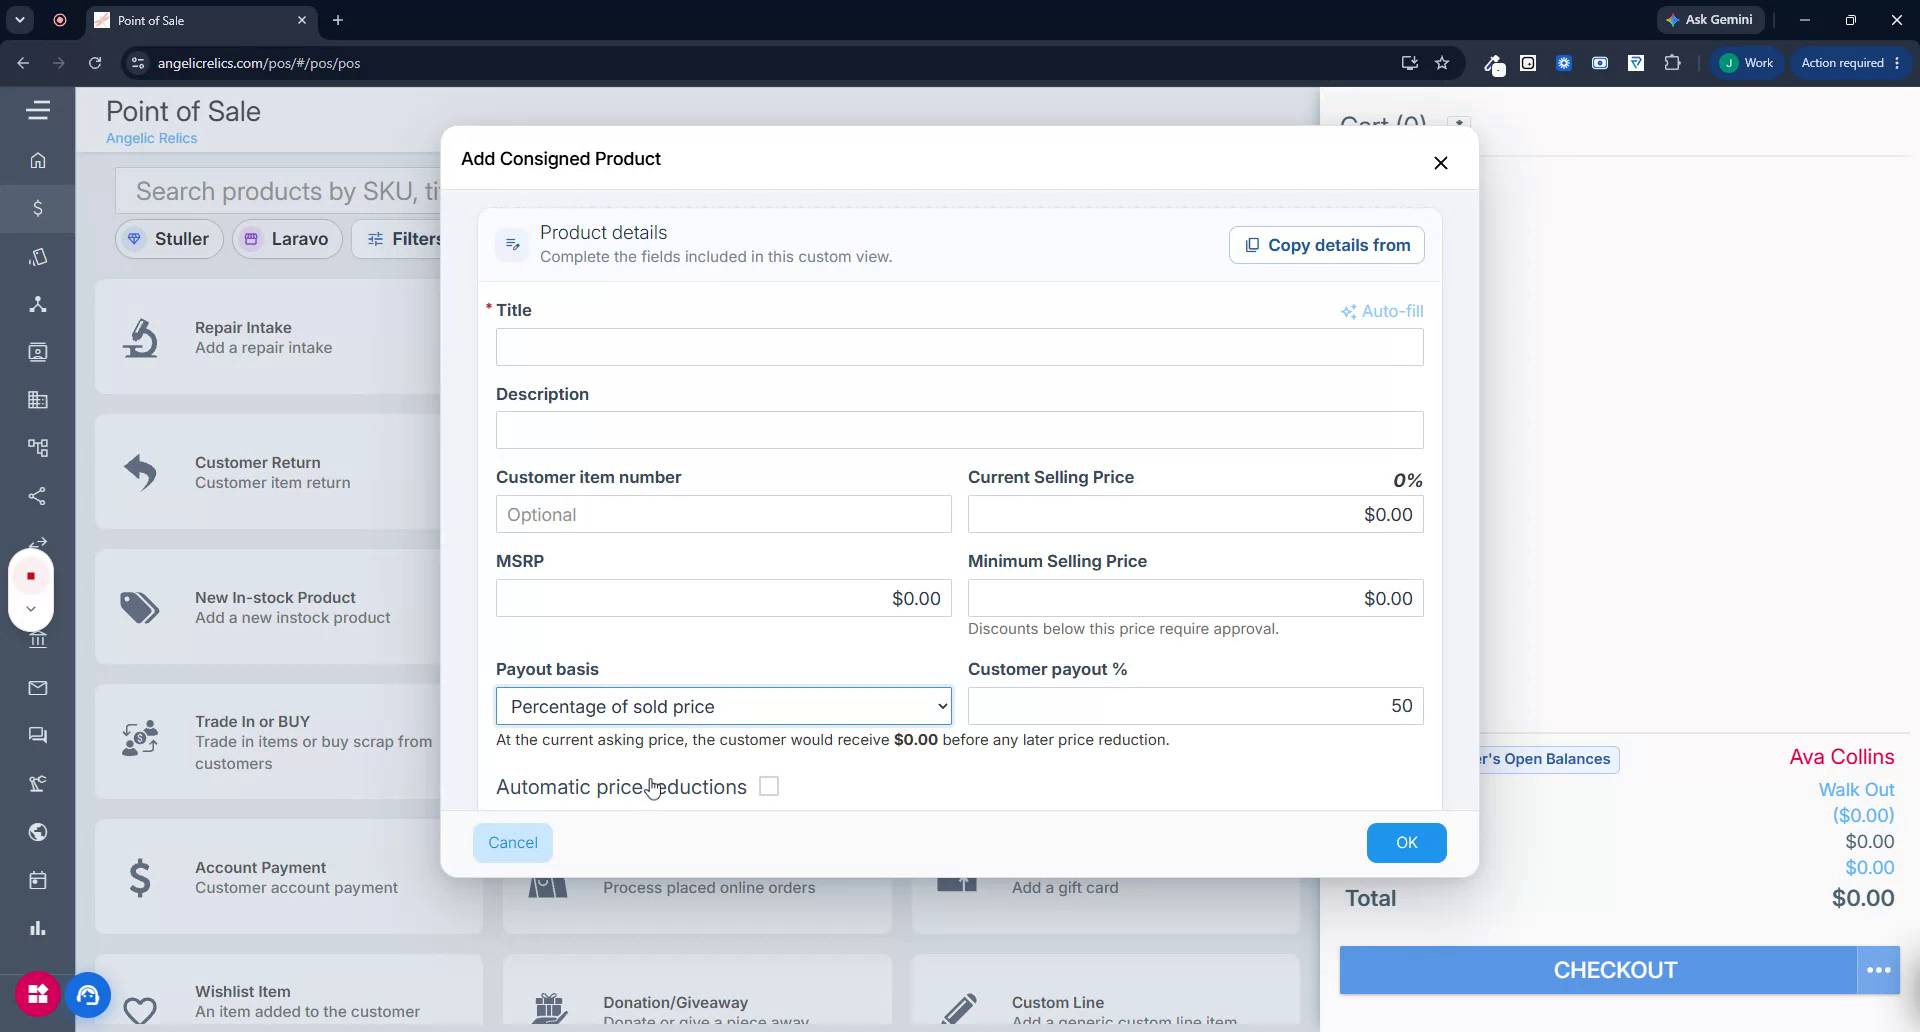
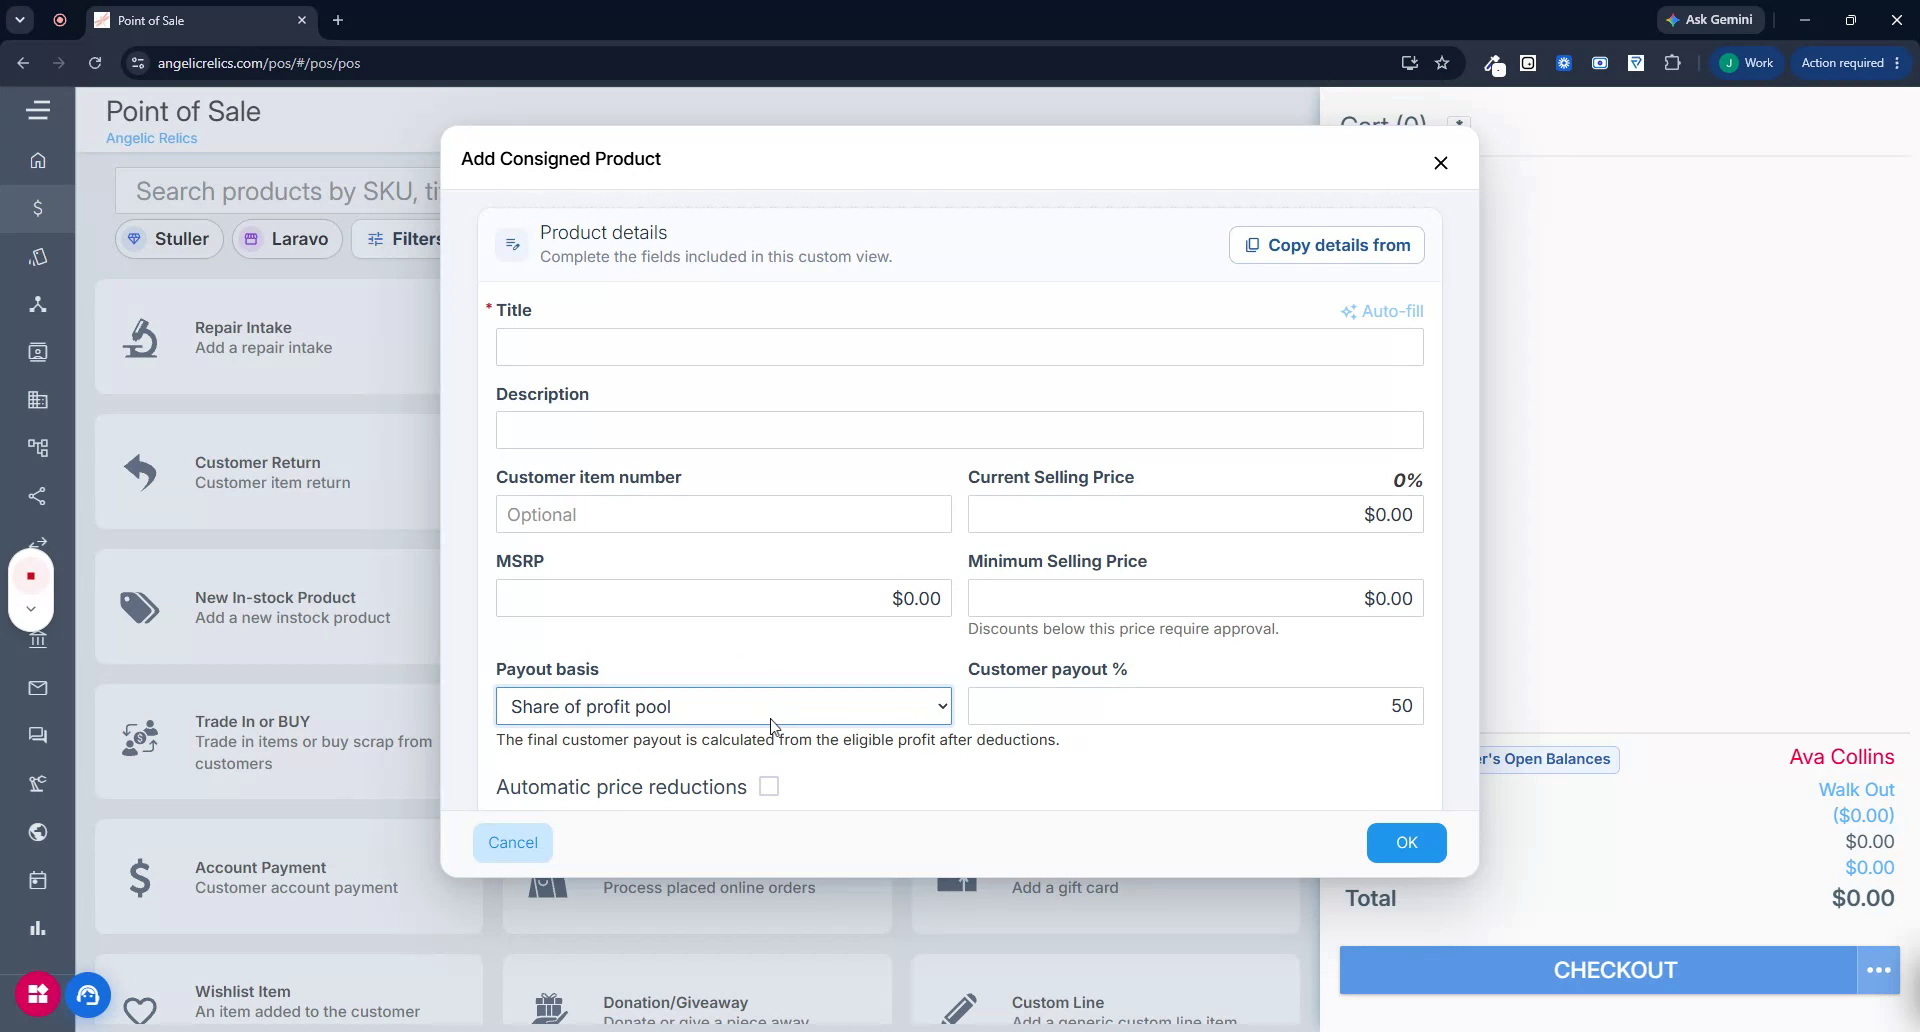
Payout Basis – How the customer will be paid for the item.
Customer Payout – The payout percentage or amount, depending on the selected basis.
Step 6: Configure Payout Basis and Customer Payout
For Payout Basis, there are two options:
Percentage of Sold Price – The customer receives a fixed percentage of the final sold price. The payout is always a fixed percentage of the actual sold price; the customer receives this percentage regardless of subsequent markdowns, and it is not recalculated upward later.
At the current asking price, this results in a defined payout amount before any later price reductions.
Share of Profit Pool – The customer’s payout is calculated from the eligible profit after any configured deductions.
Fill in any remaining required fields to complete the product setup.
Step 7: Set Up Automatic Price Reductions (Optional)
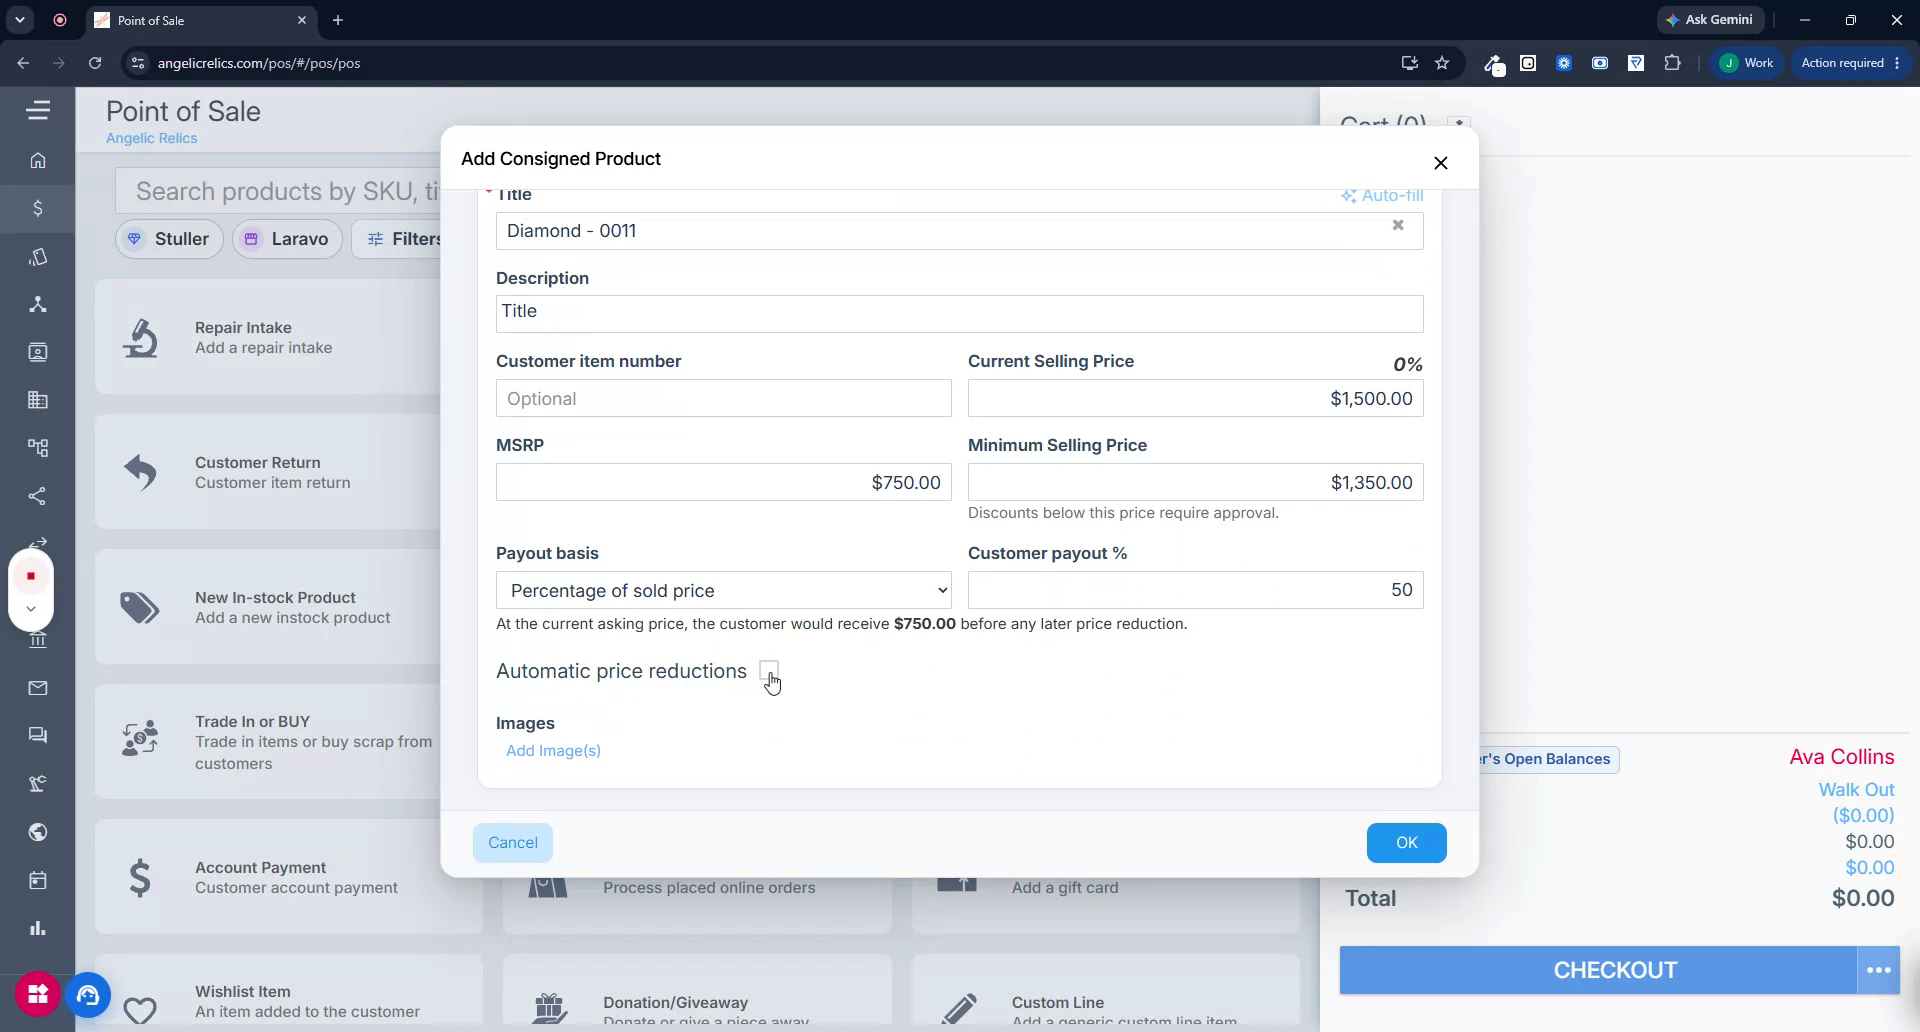
If you want to automate markdowns for the consigned item, enable the Automatic Price Reductions option.
Configure the following:
Frequency (Days) – How often the price is reduced (e.g., every 7 days).
Reduction per Step – The amount or percentage reduced at each step.
Maximum Reductions – The maximum number of reduction steps allowed.
Floor Price – The price the item should never drop below.
Notes:
Each reduction target is based on the starting price saved when the schedule was created, not on later manual price changes.
The Product Minimum Selling Price is always enforced.
If you manually set a lower price, the system will not raise it back up.
After configuring pricing, add images of the consigned product if needed to help with identification and merchandising.
Step 8: Save the Consigned Product
When all details and optional configurations (price reductions, images) are complete, click OK to save the consigned product.
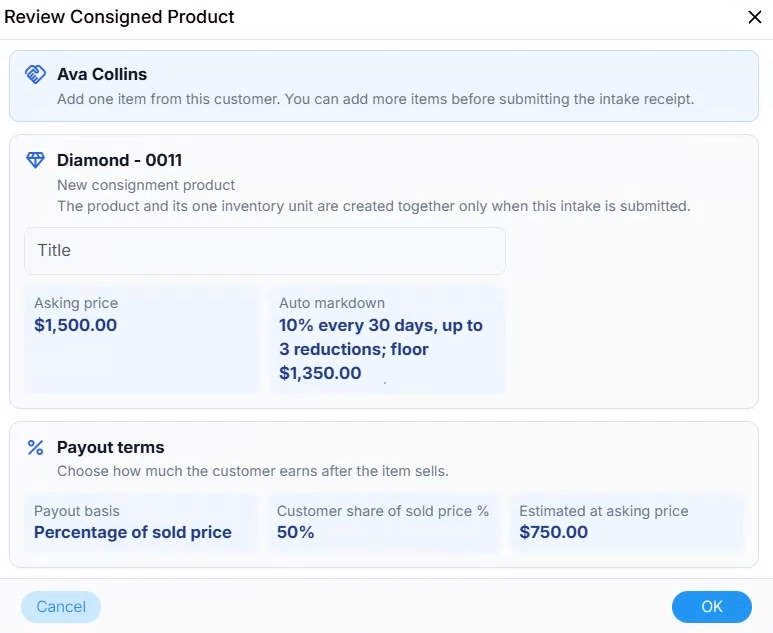
You will then see a summary of the newly created consigned product, where you can perform a final review of all details. When you are satisfied, click OK again to confirm.
Step 9: Proceed to Checkout and Collect Signature
Return to the POS and proceed to Checkout for the consignment intake.
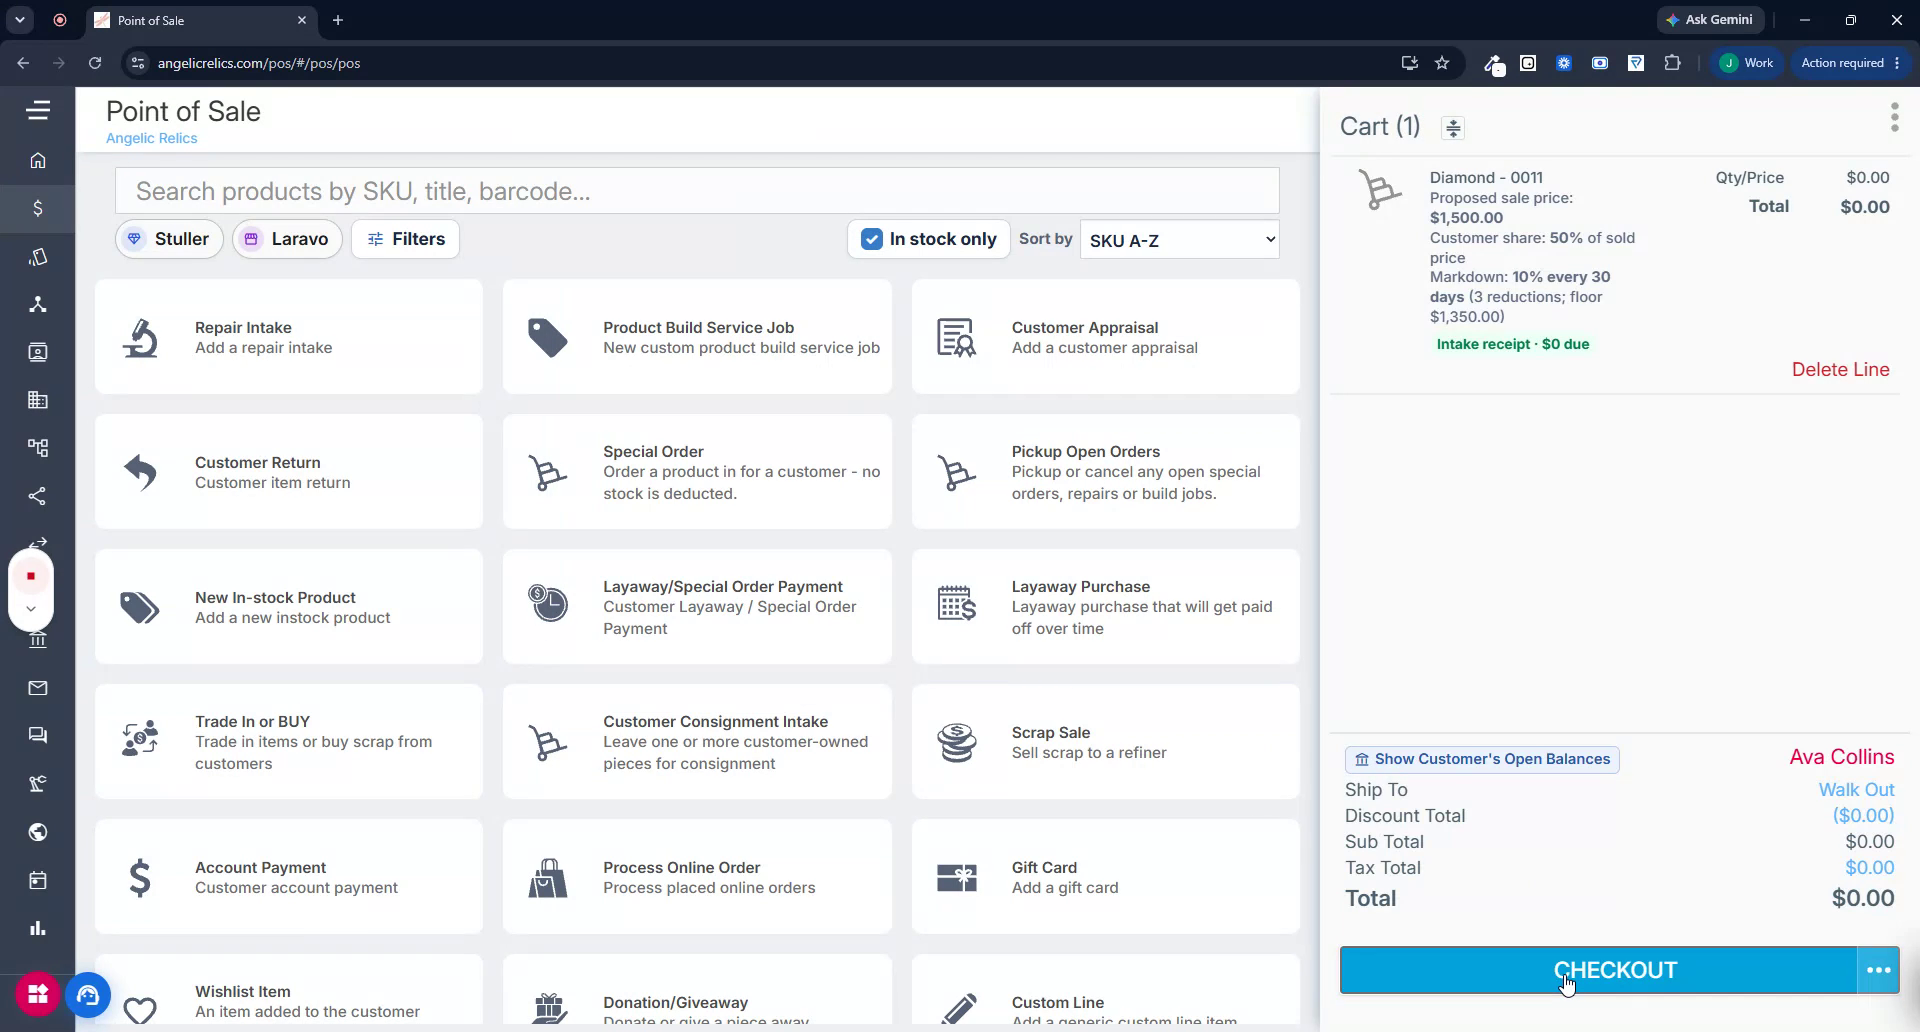
As part of the intake, collect the customer’s policy signature:
Send the consignment disclaimer to the customer’s device so they can open and sign it directly from their phone.
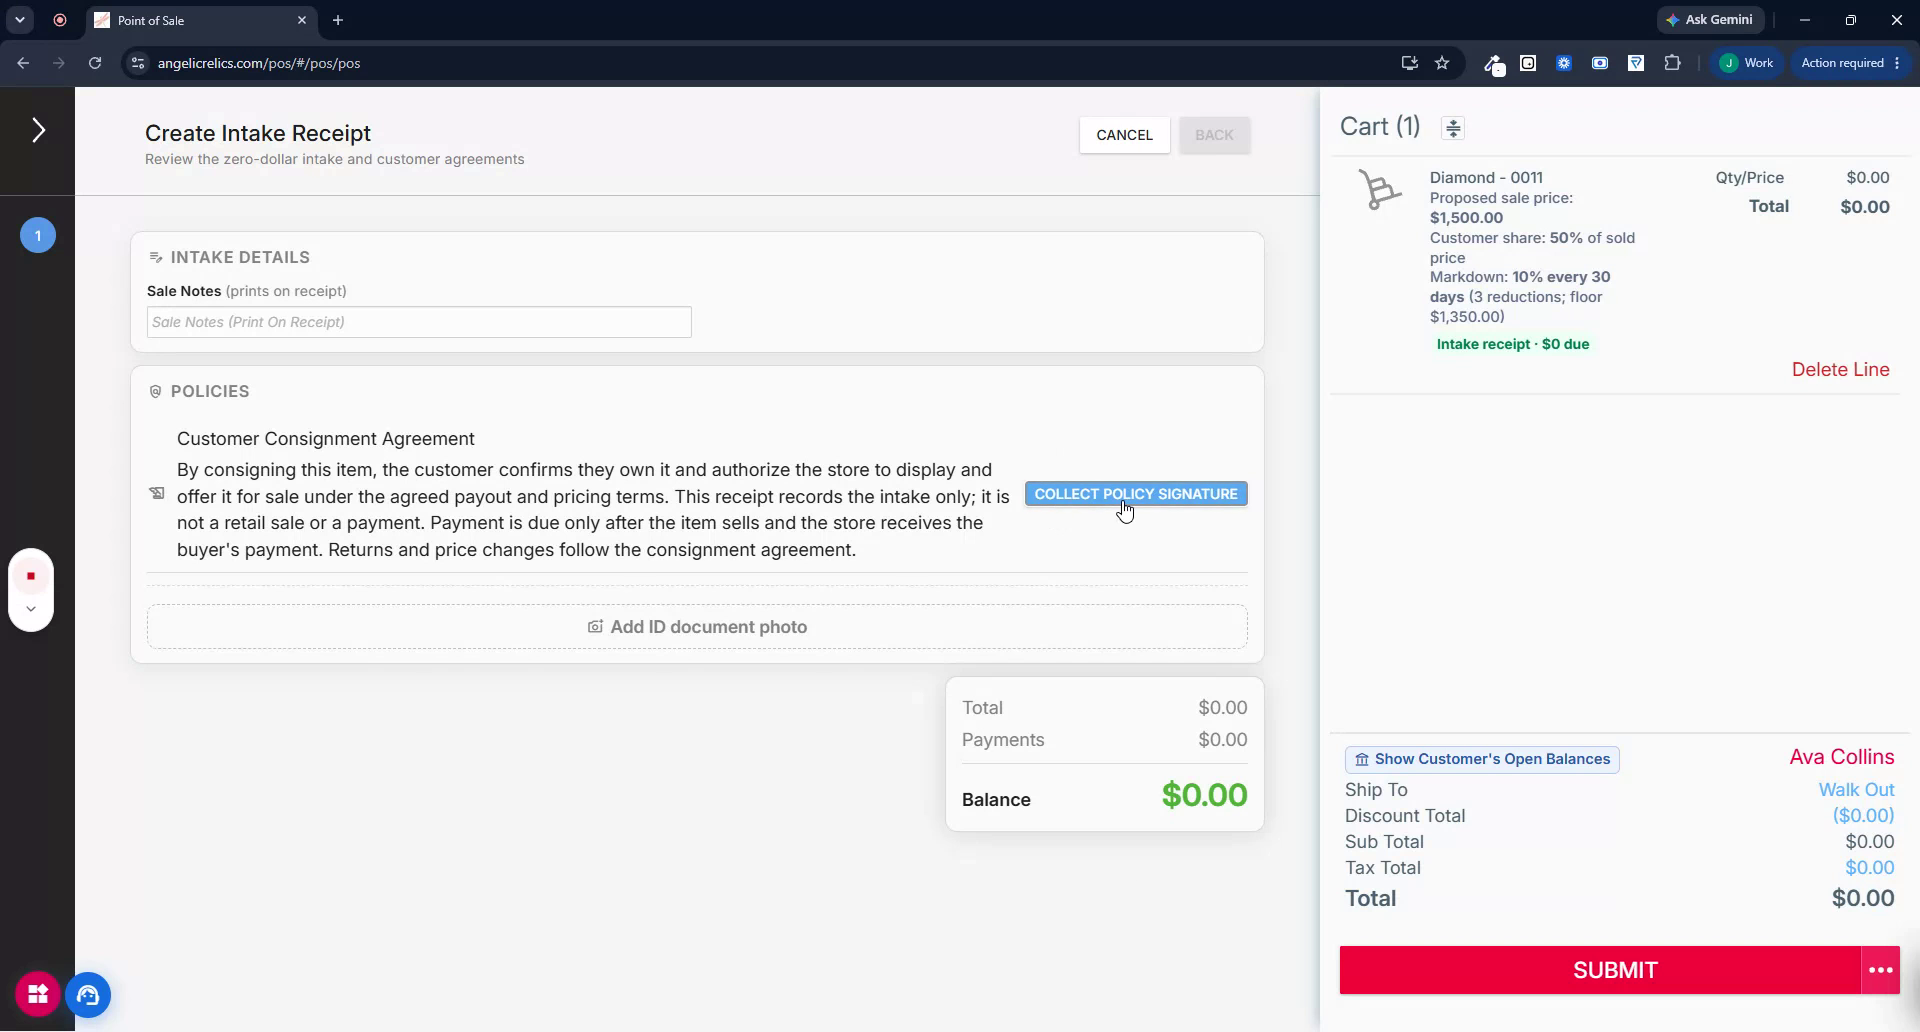
Once the customer has signed the policy, continue with the intake to finalize the transaction and complete the consignment process.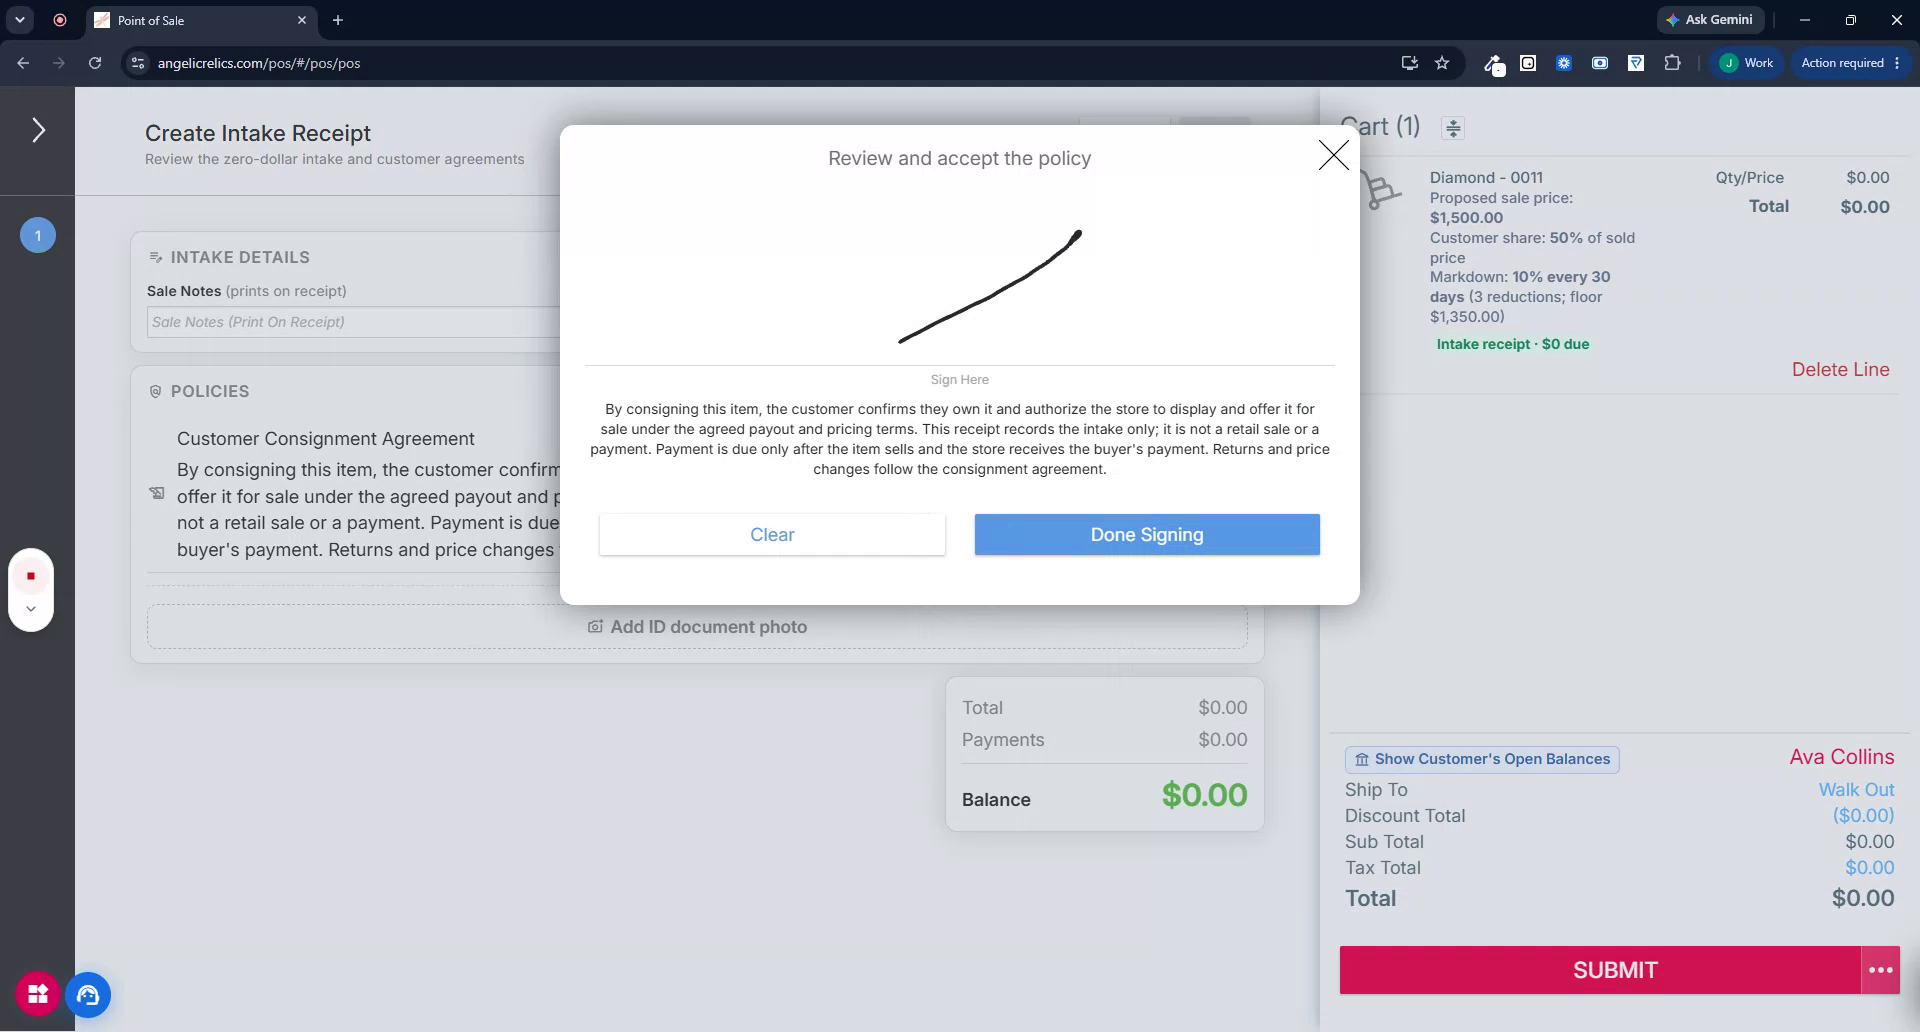
The intake is now complete, and the consigned item has been successfully added to your inventory through the POS.
Troubleshooting
If you encounter any issues while trying to create a New Customer in the POS, please reach out to Flawless POS customer support for technical assistance.
Was this article helpful?
That’s Great!
Thank you for your feedback
Sorry! We couldn't be helpful
Thank you for your feedback
Feedback sent
We appreciate your effort and will try to fix the article