In this article, we will walk you through the process of adding and managing add-on services in the POS system. Whether you need to add resizing, soldering, or any other service to a product, this guide will help you understand the workflow step by step. You’ll also learn how to manage additional services in the admin settings.
You may refer to this video for a step-by-step guide: Add-On Services
Step 1: Adding a Product to the Cart
Navigate to the Sale Module in the POS system.
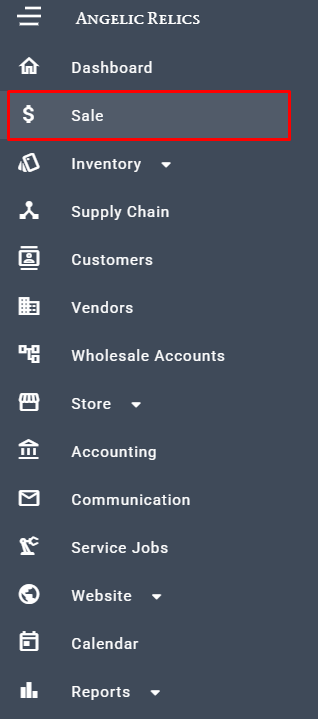
Select any product and add it to the cart.
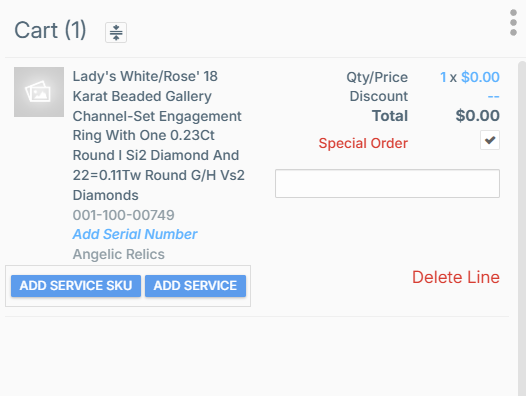
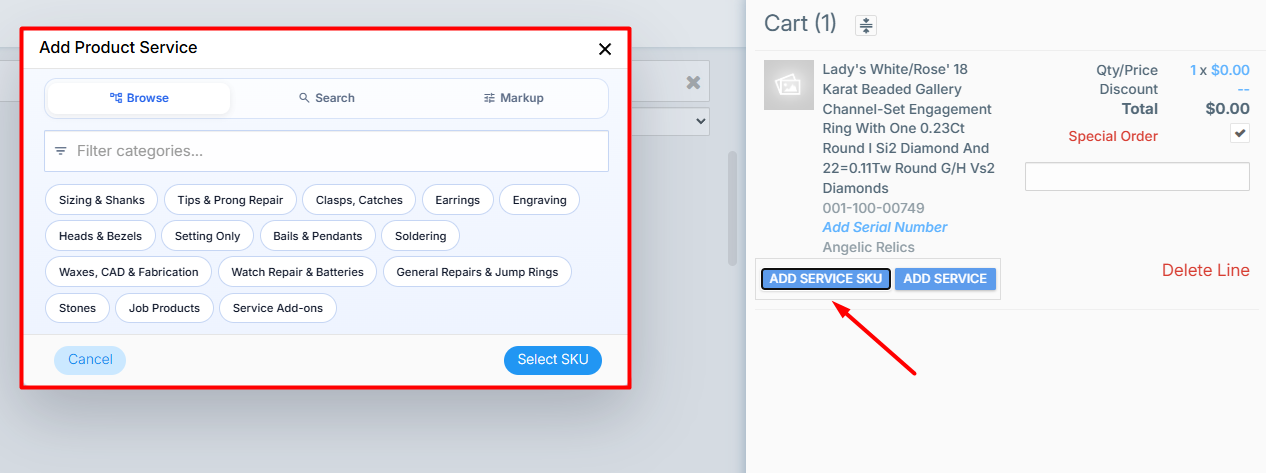
Once the product is added to the cart, select either the Add Service SKU or Add Service button in the product line and click on it.
A clicking on the Add Service dropdown menu will appear, listing the available add-on services such as adding a basic custom line, appraisal, or ring sizing.
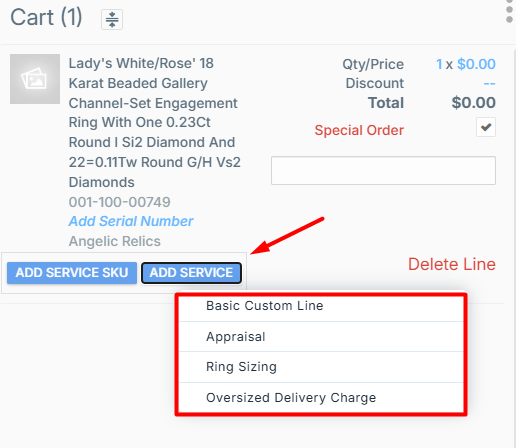
- After selecting an add-on service, a dialog window will pop up displaying the price and an additional field for the service. Below is a Ring Sizing addon
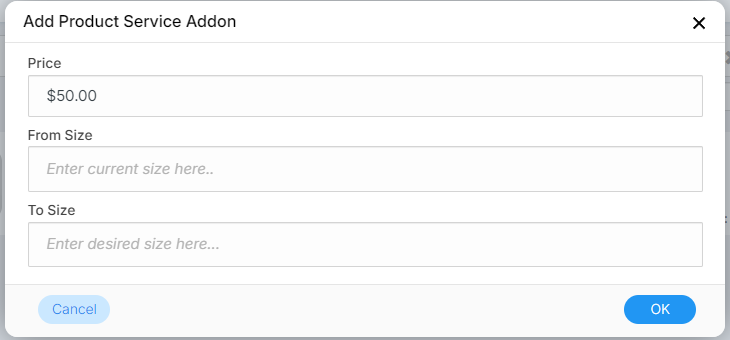
- Enter the from and to for the service ( From size 8 to 9 )
- Click OK to confirm.
- A service box will now appear in the cart, showing the selected service.
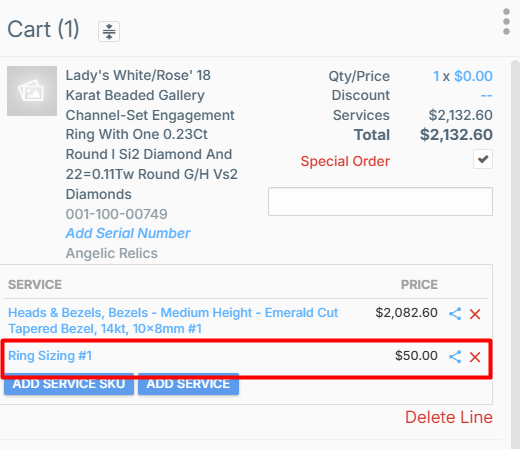
- After selecting an add-on service, a dialog window will pop up displaying the price and an additional field for the service. Below is a Ring Sizing addon
On the other hand, clicking on the Add Service SKU dropdown menu will be display all of the product services available. You can choose to browse/search the products or configure the markup.
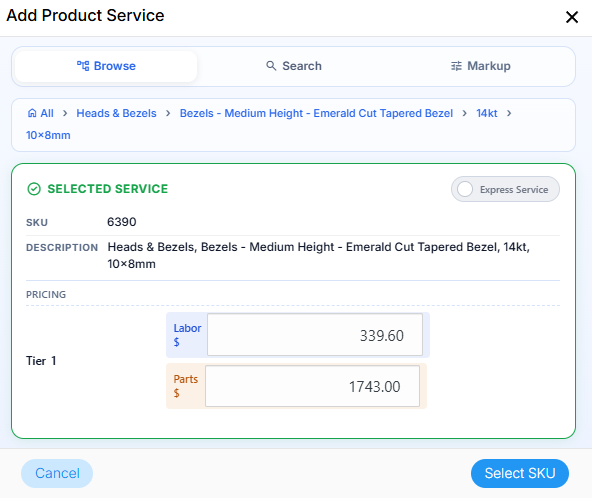
- Once a service has been selected, labor and parts cost will automatically populate. You'll also be able to edit these fields
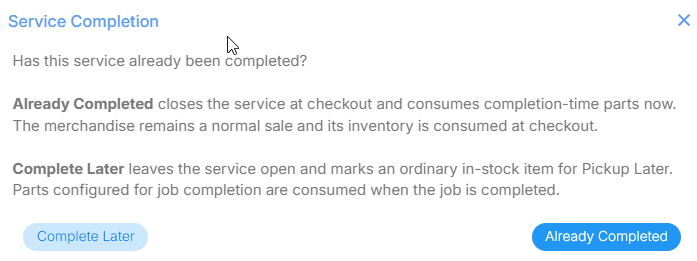
- Once settled, click on Select SKU. This will add the service to the product. There will be a prompt which asks whether or not the service job has already been completed.
Step 2: Managing the Add-On Service in the Cart
On the service box, you will find two options:
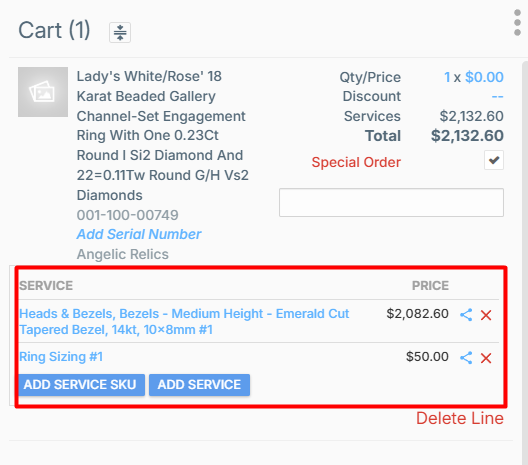
Remove Service: Deletes the selected service from the cart.
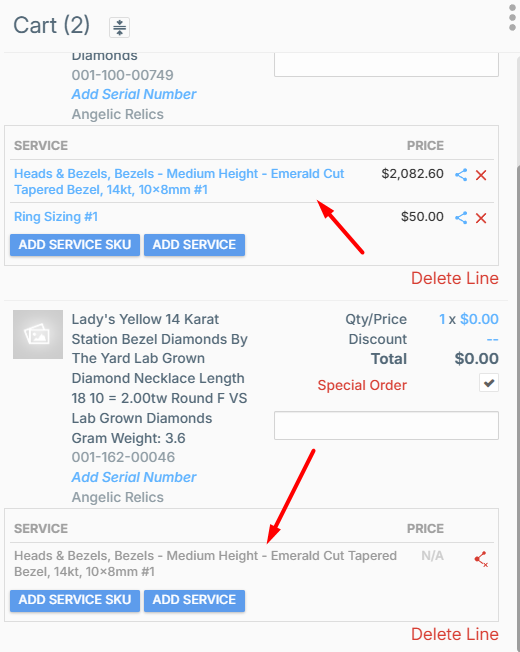
Share Service: Allows you to apply the same service to another product in the cart.
If you select Share Service, a dialog window will appear. Choose the product(s) you wish to share the service with, and click OK to confirm.
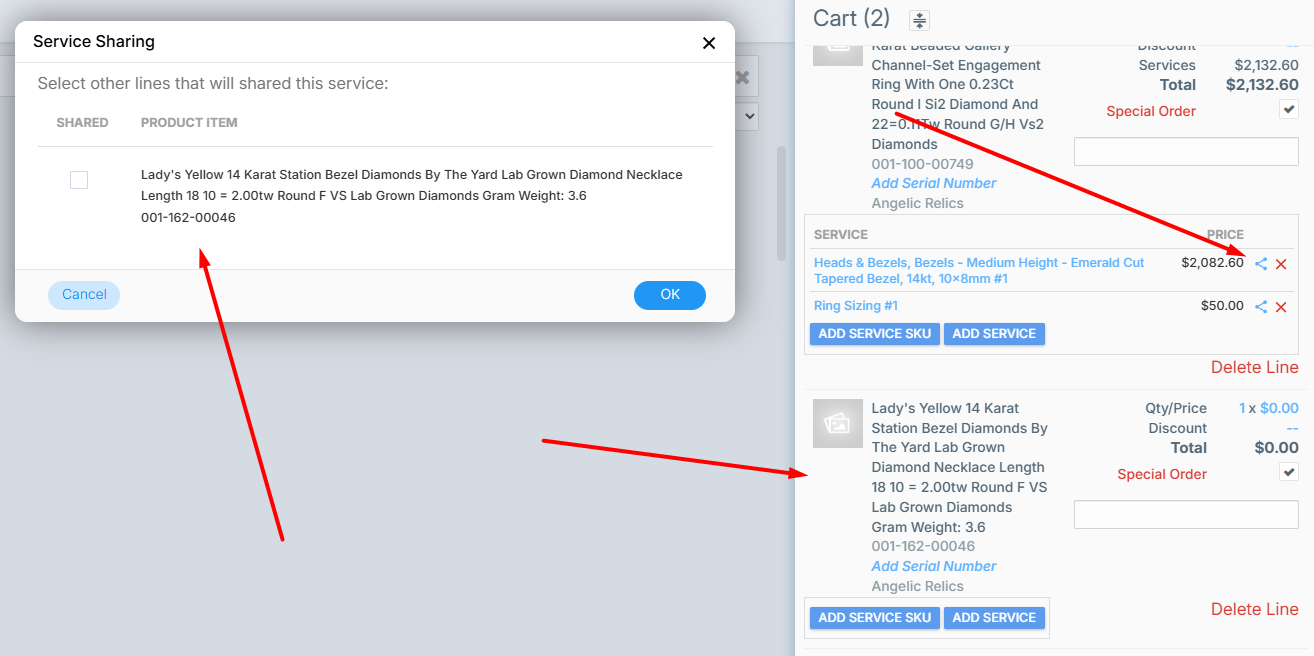
This is particularly useful for applying the same service to multiple products in a single transaction.
Step 3: Completing the Checkout
Once you are satisfied with the selected services, proceed to checkout as you normally would.
The services will be included in the total and displayed on the receipt for reference.
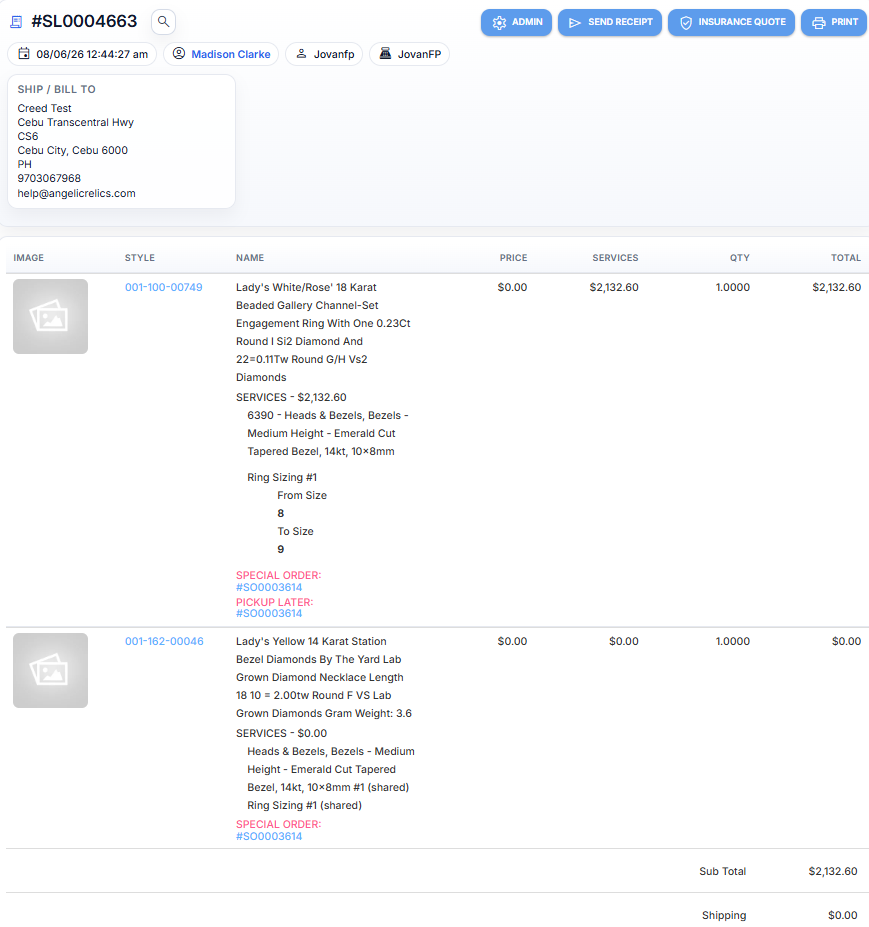
You will also be able to print out the Service Job's Work Order on the Sale Options
Troubleshooting:
If you encounter issues while adding or managing add-on services, verify the JSON syntax and ensure the service settings are configured correctly. For additional support, contact Flawless POS customer support.
Was this article helpful?
That’s Great!
Thank you for your feedback
Sorry! We couldn't be helpful
Thank you for your feedback
Feedback sent
We appreciate your effort and will try to fix the article